Wood Star Serving Tray or Wall Decor
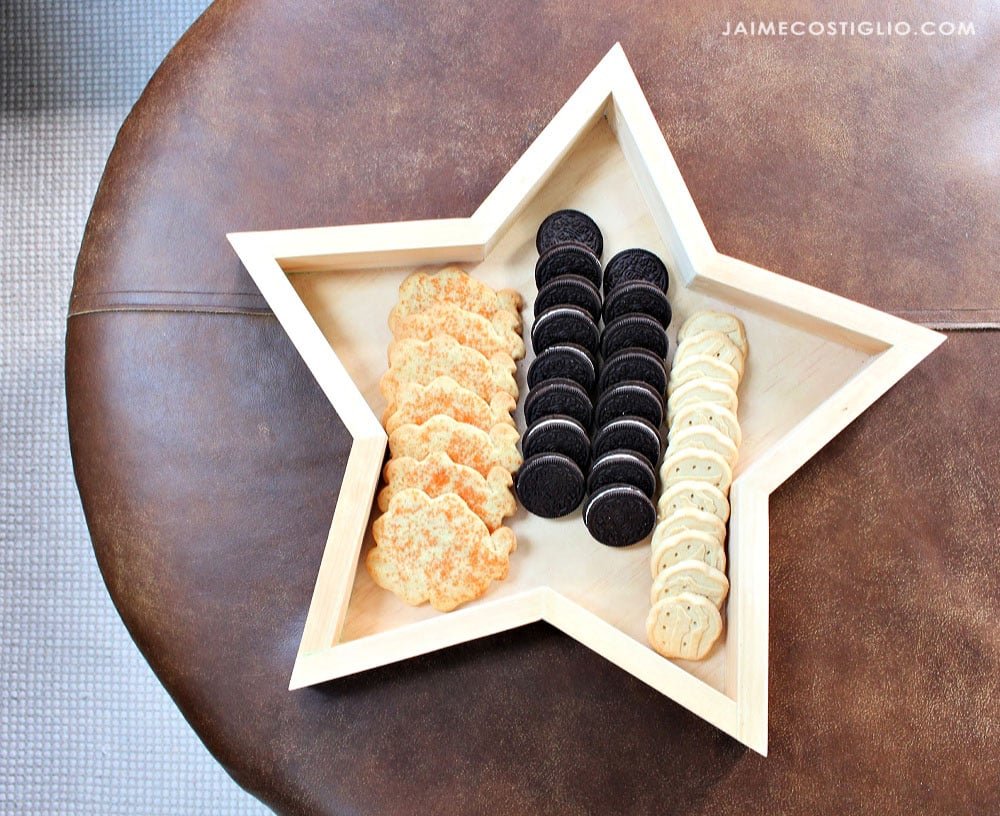
Craft your own wood star serving tray! Fill with treats and bites, and bring as the perfect hostess gift, or display at your next holiday party. We also love this wood star as wall decor or a photo frame. from Built by Jaime Costiglio for Handbuilt Holiday
Specifications
| Project type | Kitchen Cabinet Plan, Accessories and Serving |
|---|---|
| Room | dining room |
| Style | Farmhouse Furniture |
| Difficulty | Beginner Projects |
Dimensions
Use the size-specific shopping and cut lists below.
Shopping List
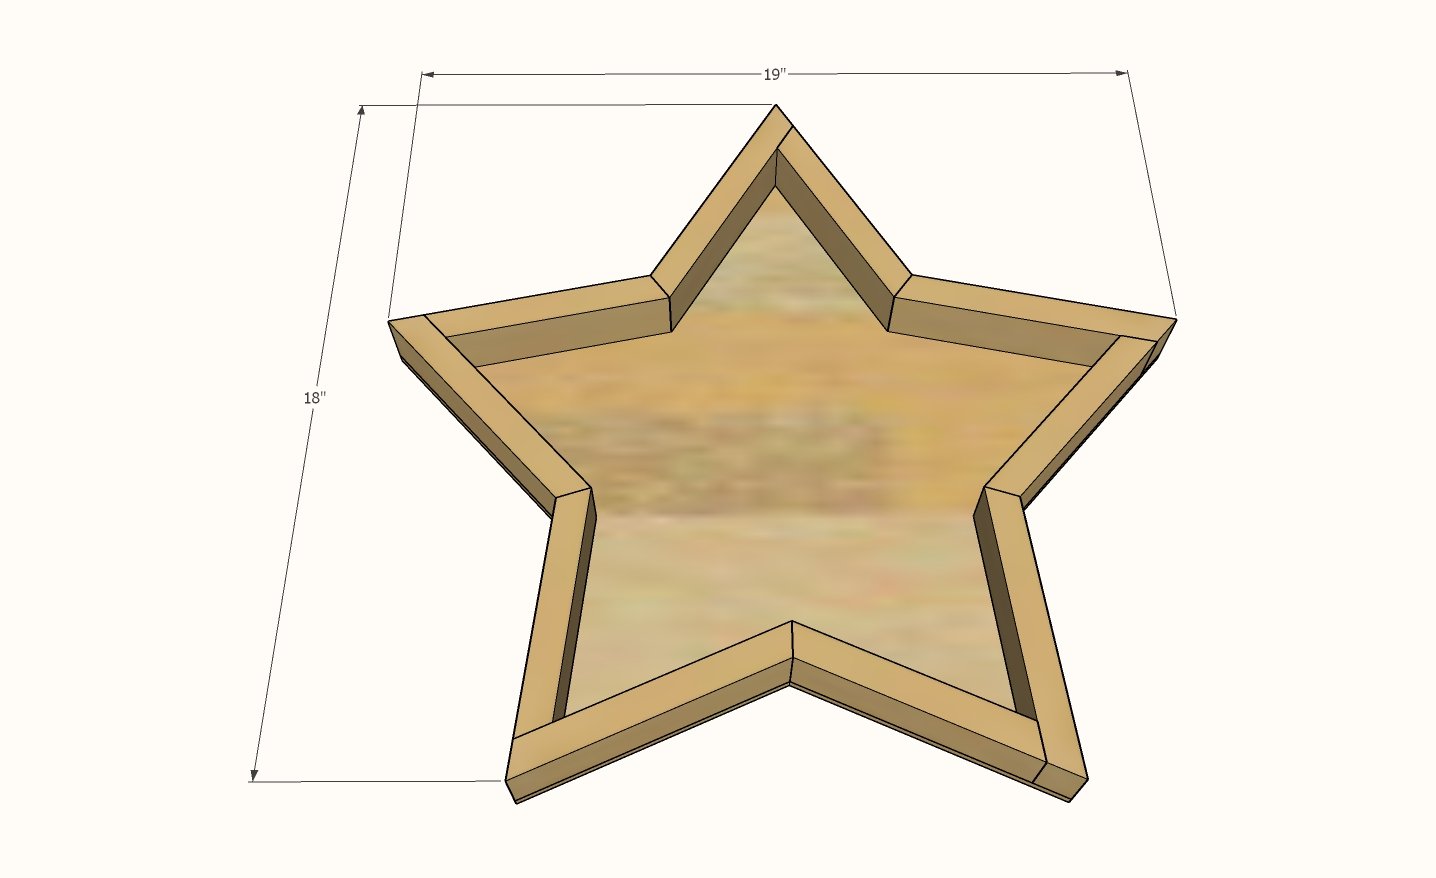
- 1 - 1x2 @ 6 feet long
- 1 - 1/4" plywood @ 19" x 19"
- 1-1/4" and 3/4" brad nails
Cut List
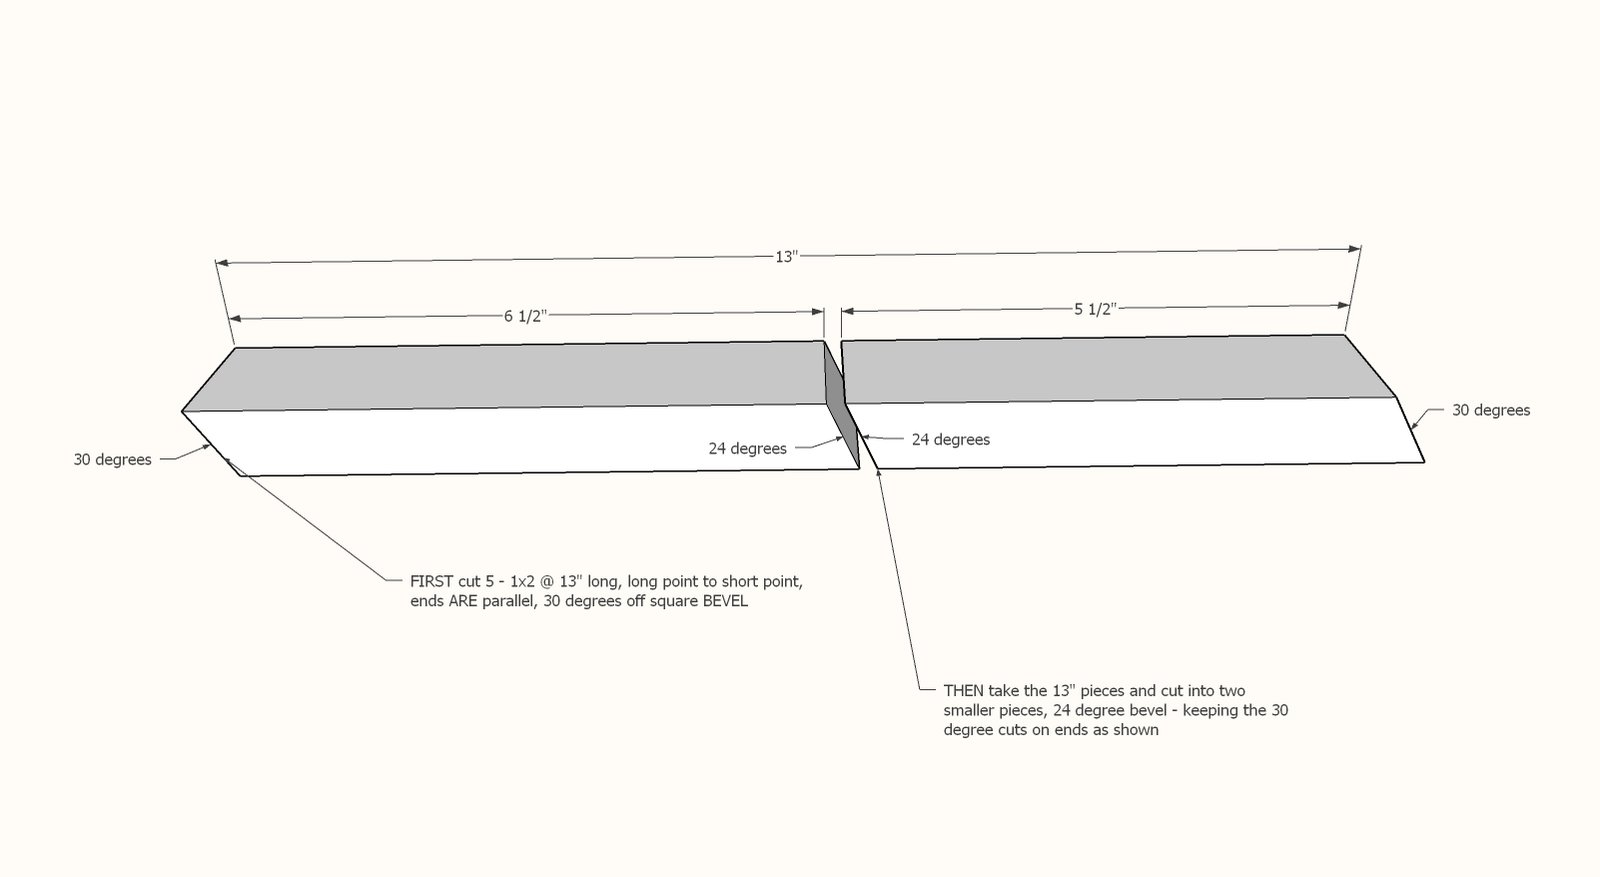
5 - 1x2 @ 13" - both ends cut at 30 degree bevel, ends ARE parallel
Cut the smaller pieces in step 1 from these boards
The back 1/4" plywood should be traced and cut to fit
Tools
- measuring tape
- pencil
- jigsaw
- compound miter saw
- nailer
Step-by-step Instructions
Step 1
Set the miter saw to 30 degree bevel and cut 10 1x2s, with ends parallel, to 13" overall length, long point to short point measurement. Now set the miter saw to 24 degree bevel. Cut the 13" long piece into two pieces as shown in the diagram.
Step 2
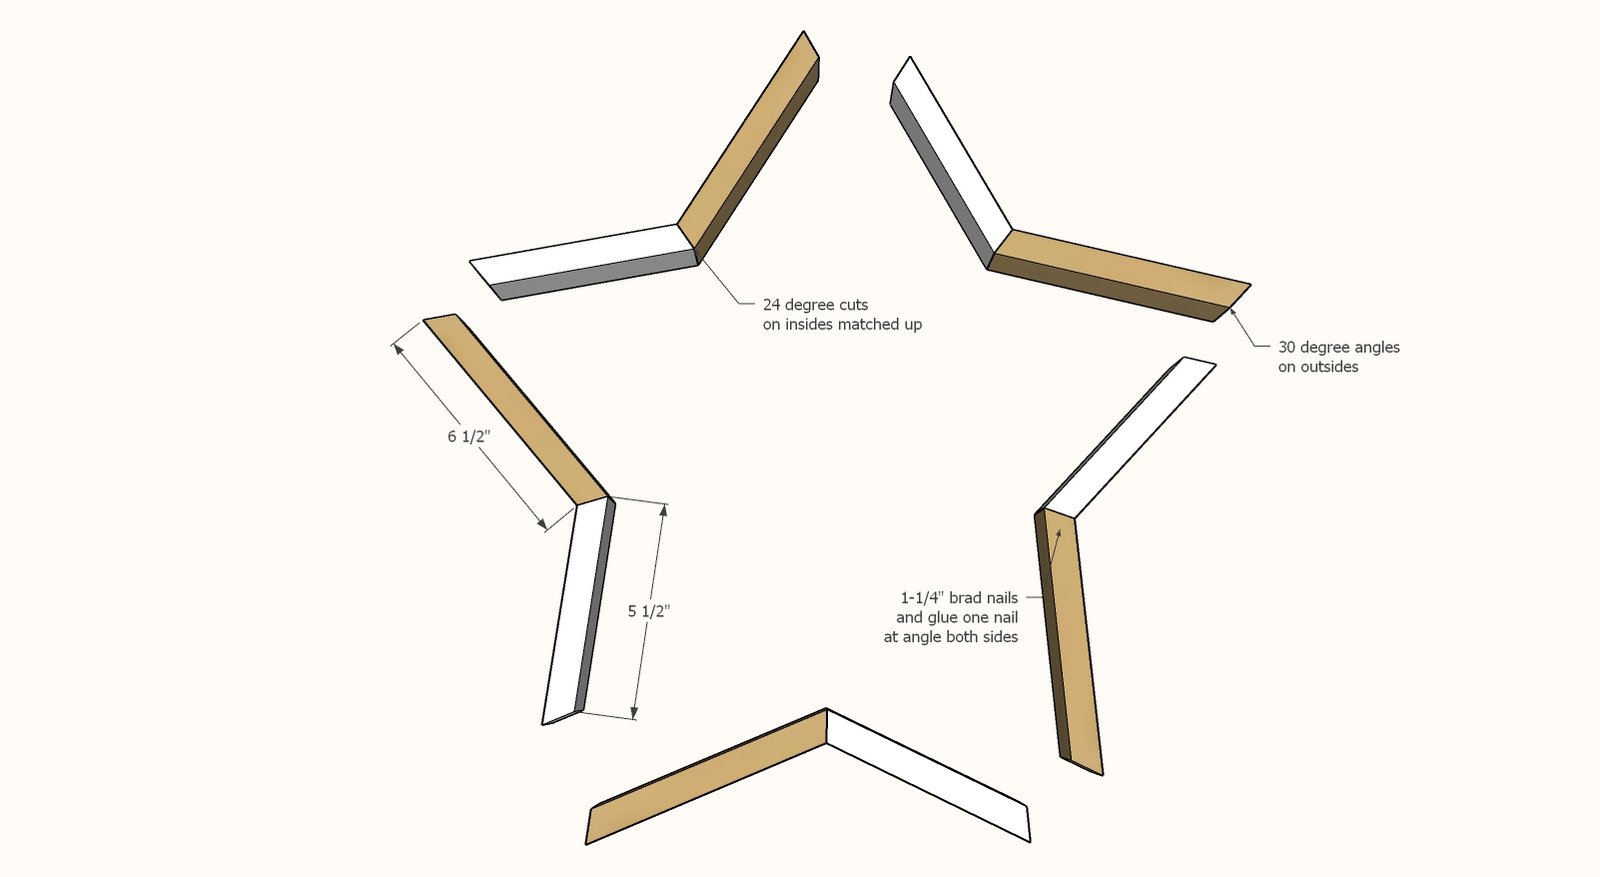
Glue one shorter and one longer piece together. Hot glue works really well, but regular glue is good too - just let it dry. You can also nail the joints for added strength, but it will be a little tricky nailing at an angle.
Step 3
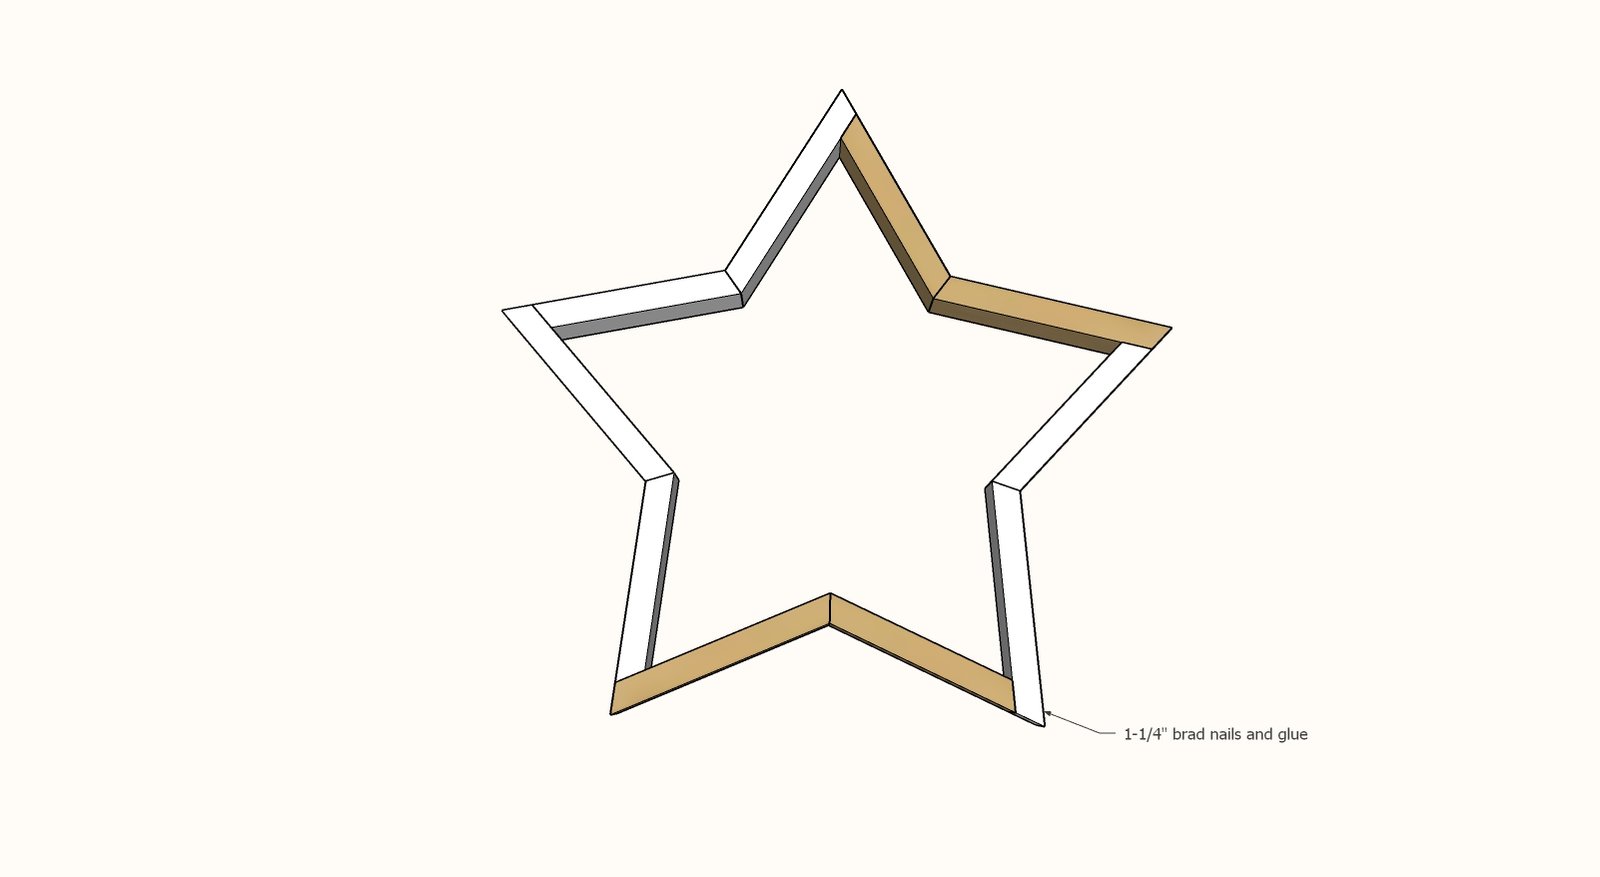
Nail and glue the sections together to create the star.
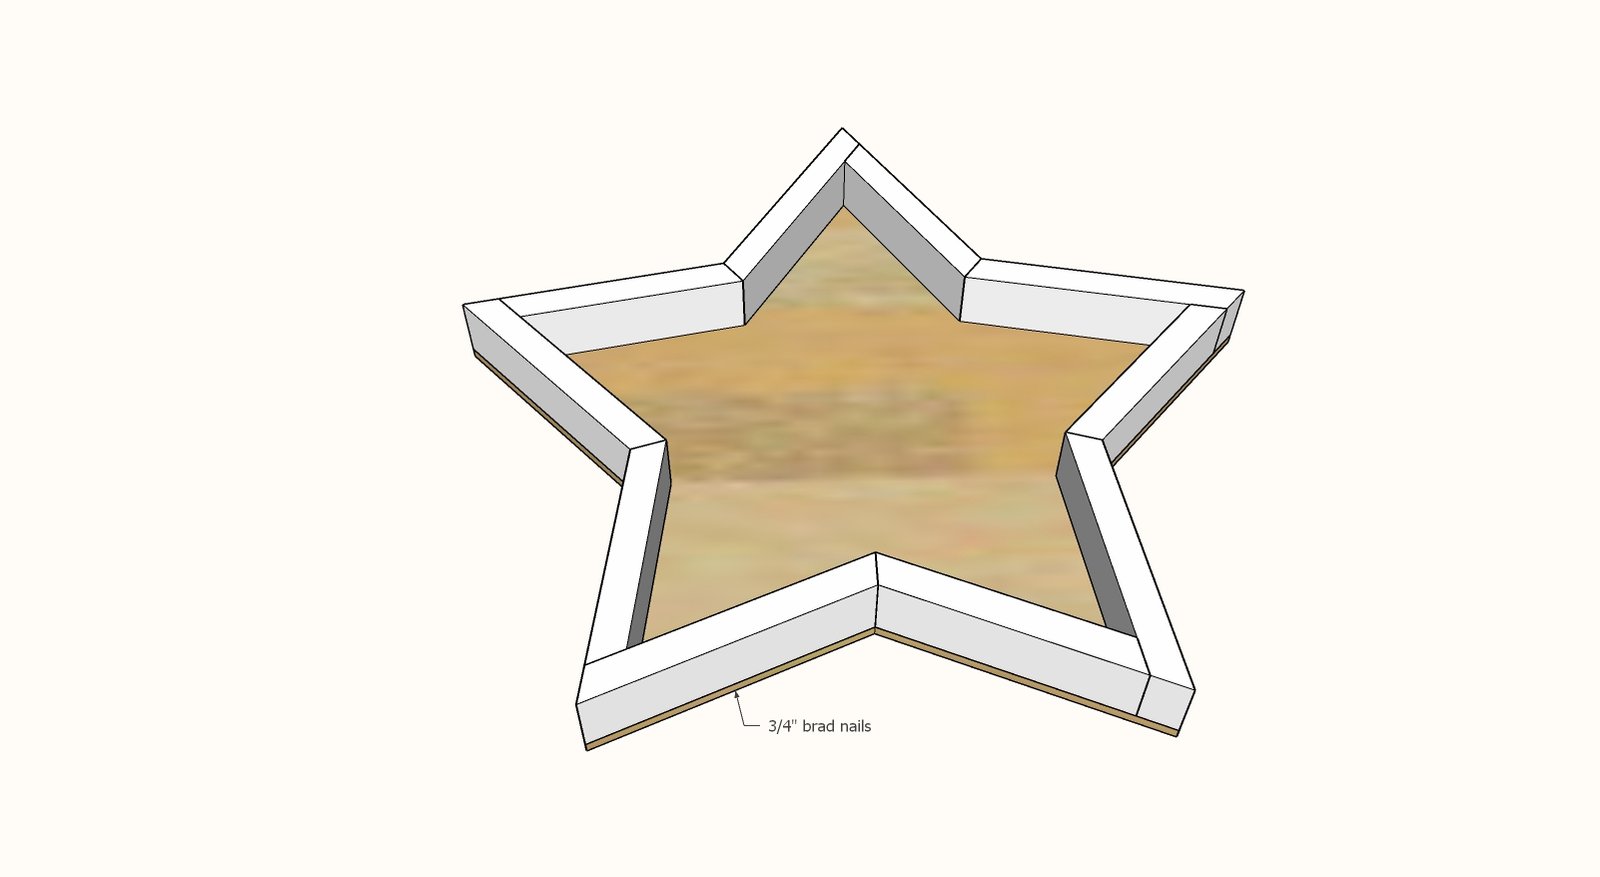
Place the wood star on the 1/4" plywood and trace the outline on the outside.
Cut out with a jigsaw. Glue and nail with shorter nails to the back of the 1x2 frame.
Finishing
Sand all surfaces, starting with a medium grit and finishing with fine. Wipe off the dust, fill any holes or gaps with wood filler, and sand smooth once dry. Apply primer if you're painting, then finish with your choice of paint or stain and seal with a durable clear topcoat. For outdoor projects, use exterior-rated primer, paint or stain, and sealer so the piece stands up to the weather.
Source (temporary): https://www.ana-white.com/woodworking-projects/wood-star-serving-tray-or-wall-decor