Wood Step Stool Plans with Splayed Legs
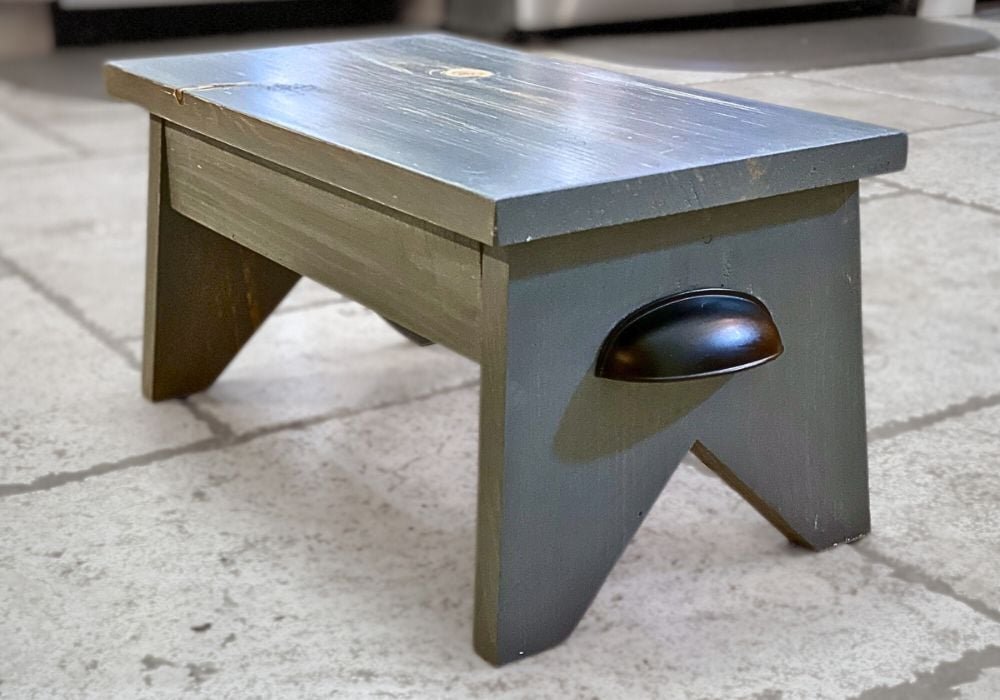
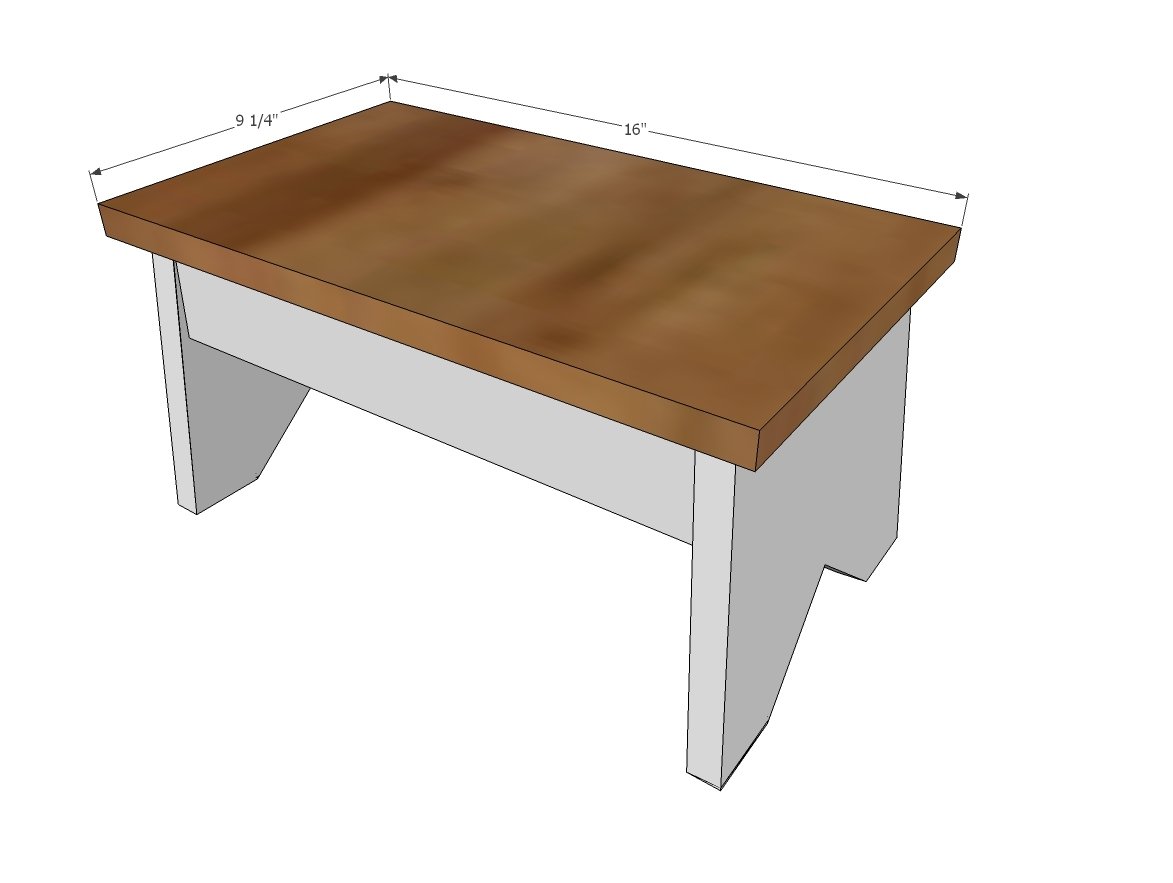
Build your own wood step stool with. Features angled legs for added durability and stability. Solid wood design is easy to stain or paint and will last and last (ours is still going half a decade later). Build with just 1x10s and 1x3s for about $15. Step by step plans with diagrams, shopping and cut list from
Specifications
| Project type | Stools |
|---|---|
| Room | Bathroom |
| Difficulty | Beginner Projects |
Dimensions
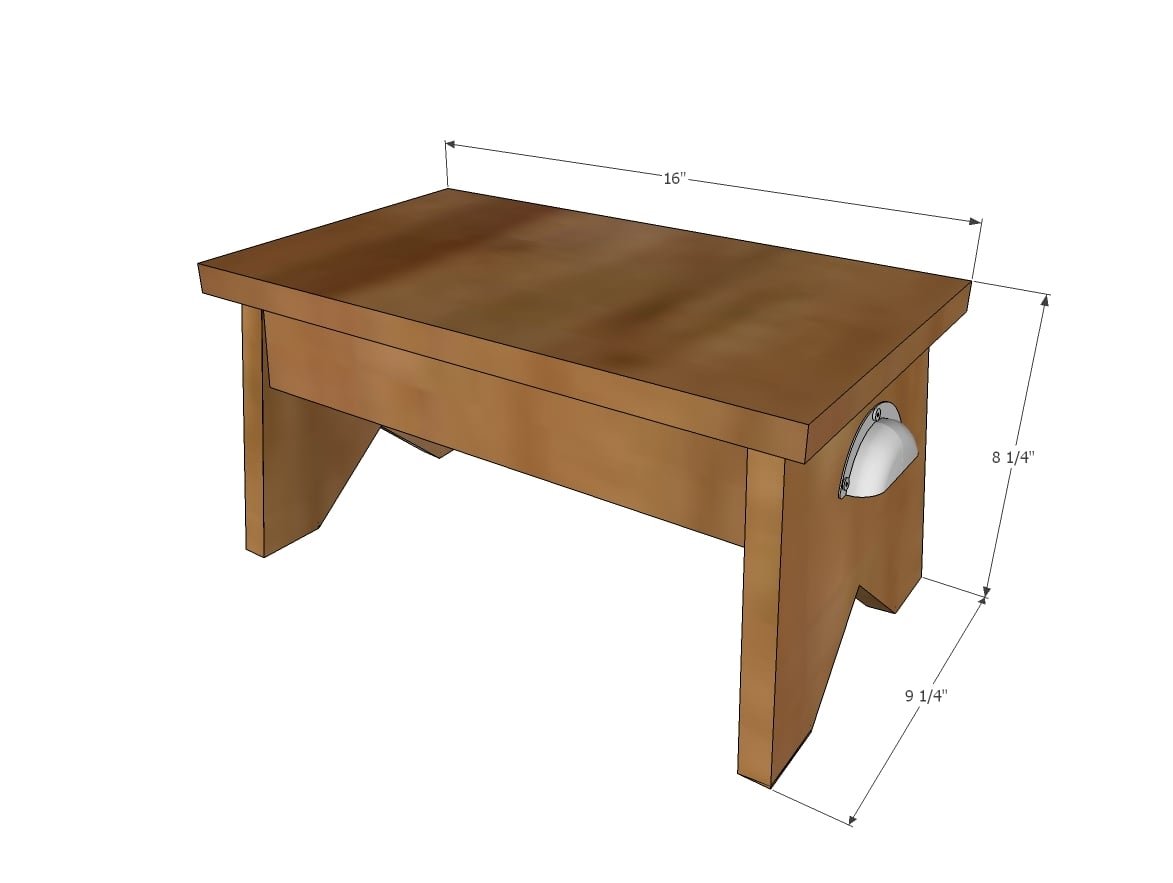
Use the size-specific shopping and cut lists below.
Shopping List
- 3 feet of 1x10 boards
- 3 feet of 1x3 boards
- knobs or handles (optional)
Cut List
- 2 - 1x10 @ 7-1/2" long, both ends beveled at 5 degrees off square, long point to short point, ends ARE parallel to each other
- 2 - 1x3 @ 13" long, both ends cut at 5 degree angles, shortest point measurement, ends NOT parallel
- 1 - 1x10 @ 16"
Tools
- measuring tape
- square
- pencil
- safety glasses
- hearing protection
- kreg-jig
- drill
- jigsaw
- compound miter saw
Step-by-step Instructions
Step 1
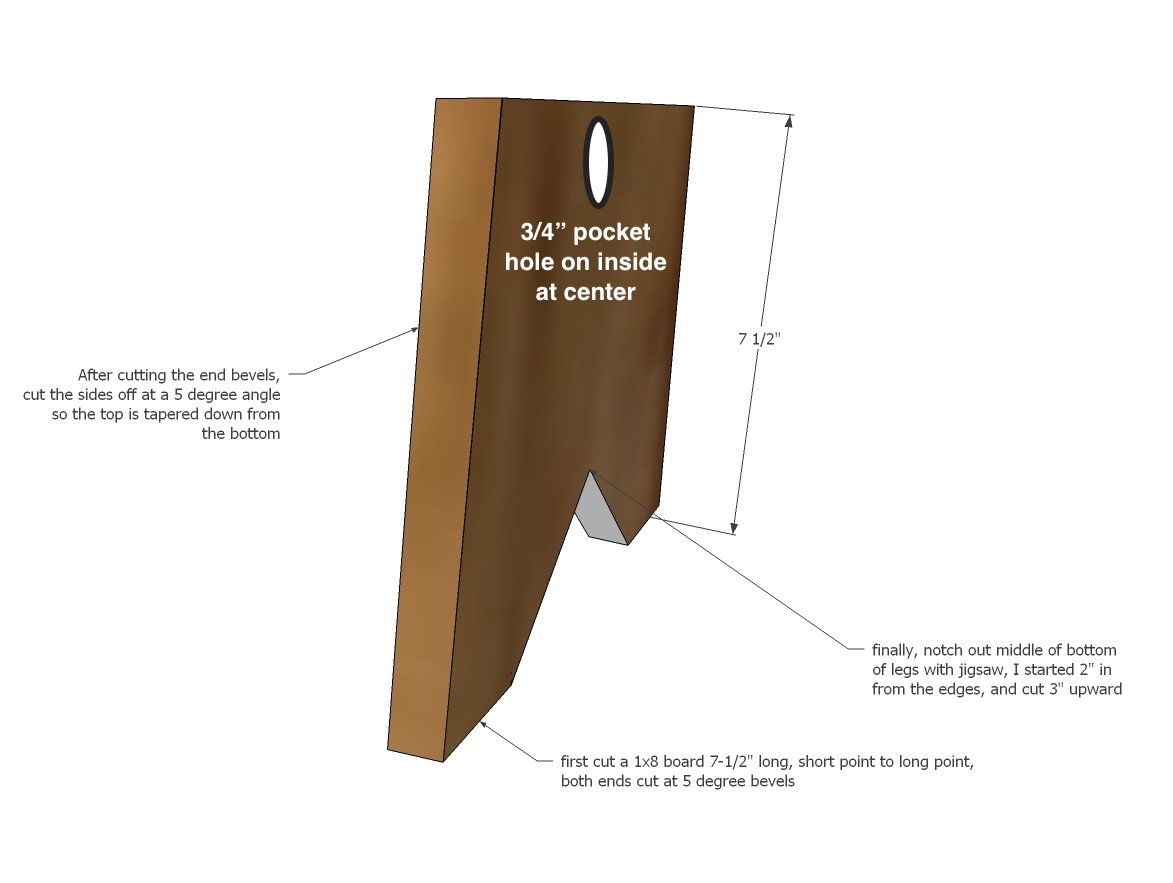
Set your miter saw to a 5 degree bevel cut, and then cut two 1x8 board pieces, so the ends are beveled at 5 degrees and parallel to each other, with a long point to short point measurement of 7-1/2". These are your side pieces of the step stool. Now use a jigsaw to cut a triangle out of the bottom. Then mark inward at the top 1/2", and draw a line at a diagonal to the bottom outside corner, so the two sides are tapered as well, so the sides become a trapezoid shape. Cut with a jigsaw along your lines. Then drill a 3/4" pocket hole on the INSIDE of the leg as shown.
Step 2
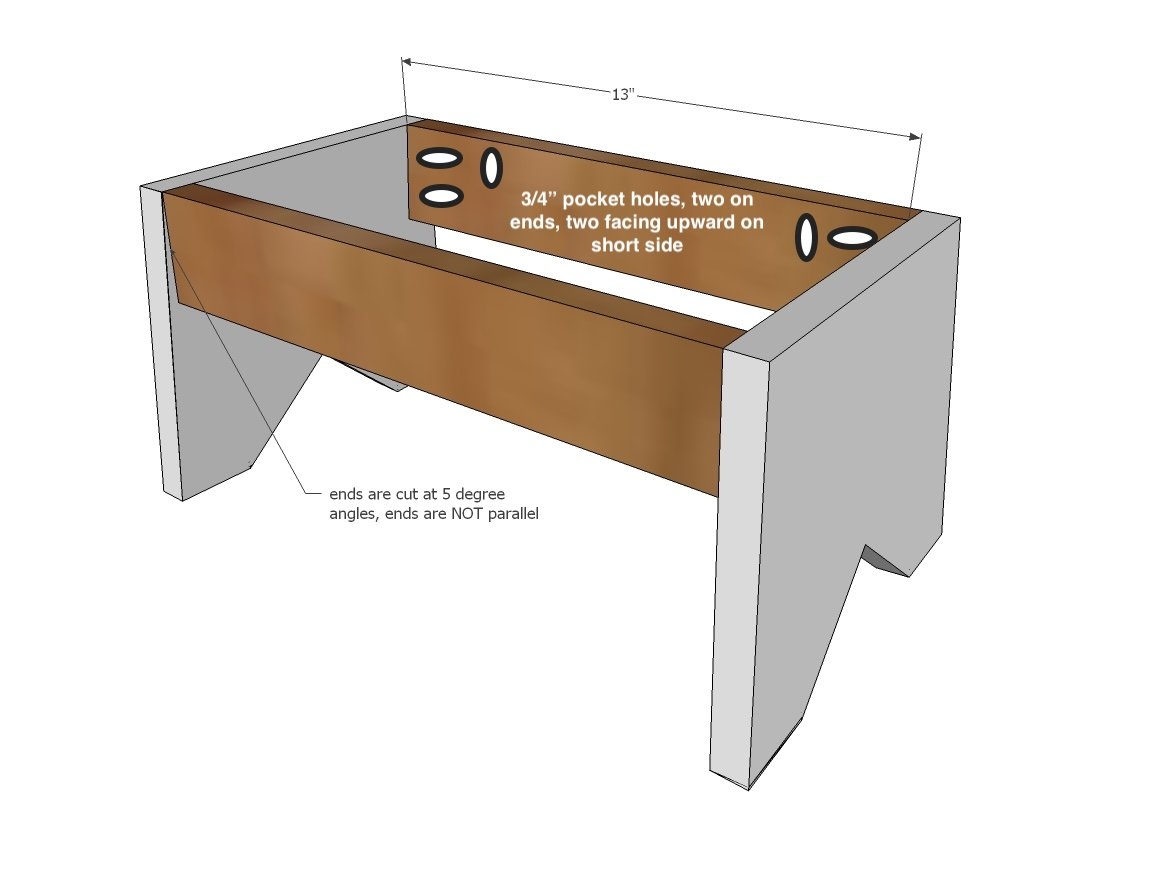
The two apron pieces are 1x3s, but this time the ends are cut at an angle, so the 1x3s are actually a trapezoid shape. Adjust the miter saw so there is no bevel, but the blade is at a 5 degree angle off square. Cut the 1x3s to 13" long at the short point to short point measurement, ends are NOT parallel. Drill 3/4" pocket holes on the ends as shown, and then two pocket holes facing upward for attaching the top in later steps. Attach the 1x3 aprons to the sides as shown, the sides will bevel out past the 1x3s as shown in the diagram, but the top will be flush.
Step 3
Attach the top 1x10 piece to the base using the pocket holes, with 1-1/4" pocket hole screws and glue.
Finishing
Sand all surfaces, starting with a medium grit and finishing with fine. Wipe off the dust, fill any holes or gaps with wood filler, and sand smooth once dry. Apply primer if you're painting, then finish with your choice of paint or stain and seal with a durable clear topcoat. For outdoor projects, use exterior-rated primer, paint or stain, and sealer so the piece stands up to the weather.
Source (temporary): https://www.ana-white.com/woodworking-projects/wood-step-stool-plans-splayed-legs