Wood Tilt Out Trash or Recycling Cabinet
Solid wood tilt out trash cabinet or recycling cabinet plans. You'll love the step by step instructions and diagrams, shopping list and cut list.
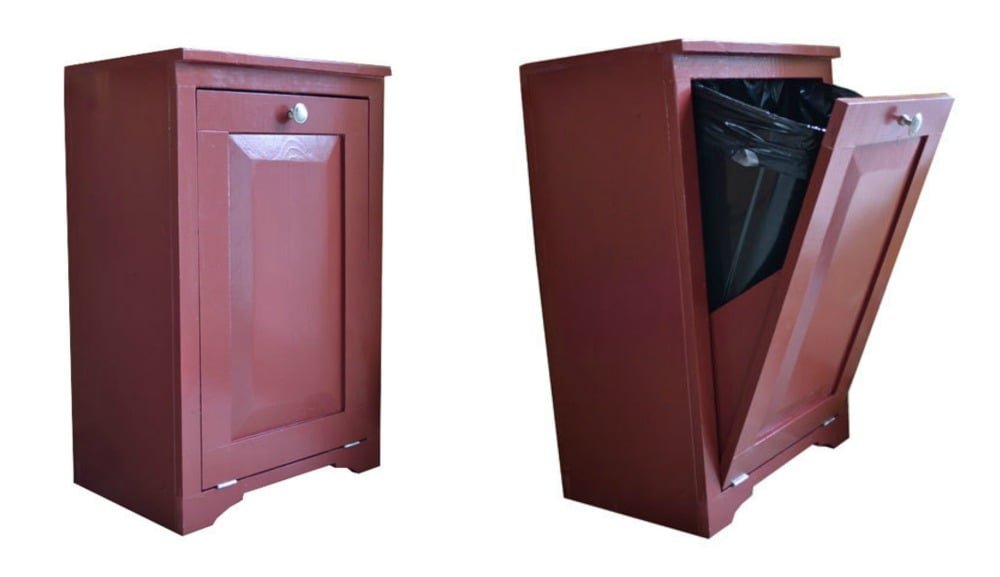
Specifications
| Project type | Kitchen Cabinet Plan, Accessories and Serving |
|---|---|
| Room | kitchen |
| Style | Farmhouse Furniture |
| Difficulty | Intermediate |
| Estimated cost | $20 - $50 |
Dimensions
Use the size-specific shopping and cut lists below.
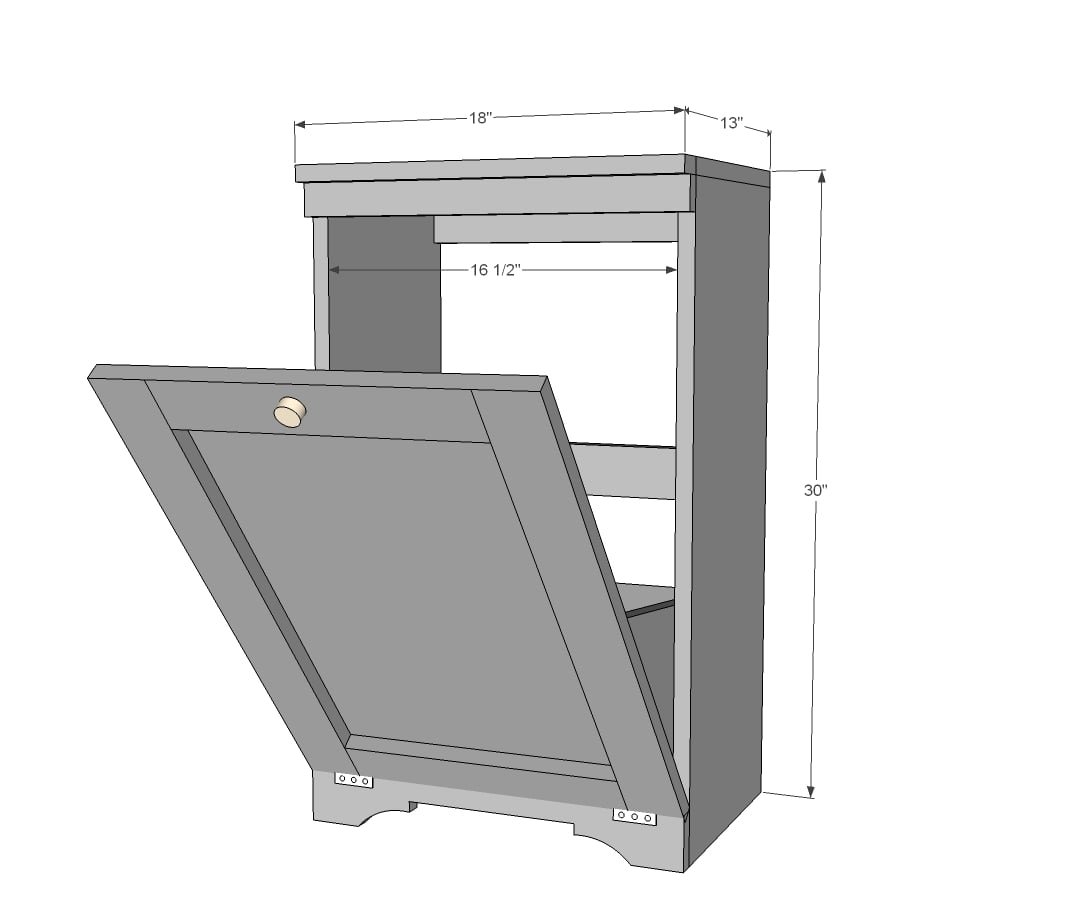
Shopping List
2 - 1x12 @ 6 feet long
2 - 1x3 @ 6 feet long
2 - 1x2 @ 4 feet long
1 - 1/4" plywood or similar 24" x 14-1/4"
Narrow Hinges (the cheapo kind with flat headed screws)
Knob or Pull
Wire or toybox lid support hinge to keep the door from opening all the way to the floor
Cut List
2 - 1x12 @ 29 1/4"
1 - 1x12 @ 18"
1 - 1x12 @ 16 1/2"
2 - 1x3 @ 16 1/2"
2 - 1x2 @ 18"
1 - 1x3 @ 18"
DOOR
2 - 1x3 @ 25"
2 - 1x3 @ 13"
1 - 1x12 @ 16"
1 - 1x12 @ 11-1/4" - cut at 45 degree angle
Tools
- measuring tape
- square
- pencil
- safety glasses
- hearing protection
- kreg-jig
- drill
- circular saw
- compound miter saw
- nailer
- sander
Step-by-step Instructions
Step 1
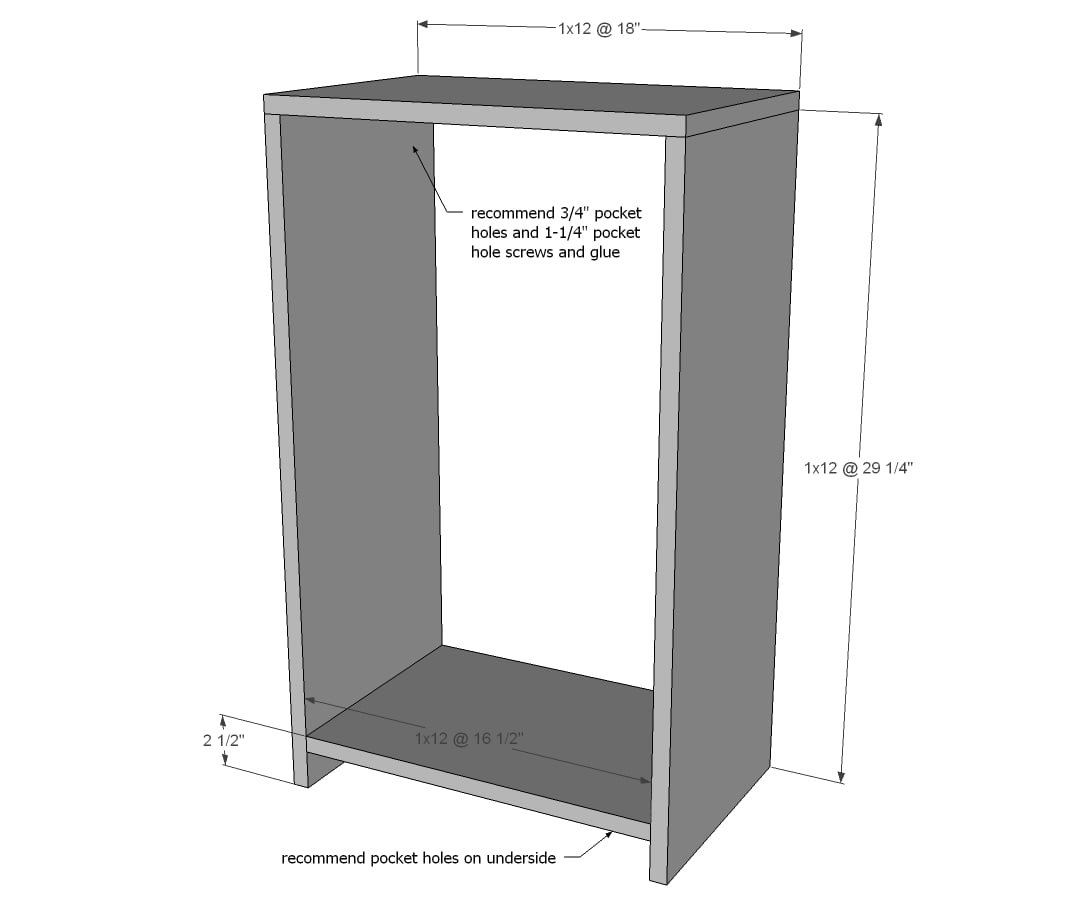
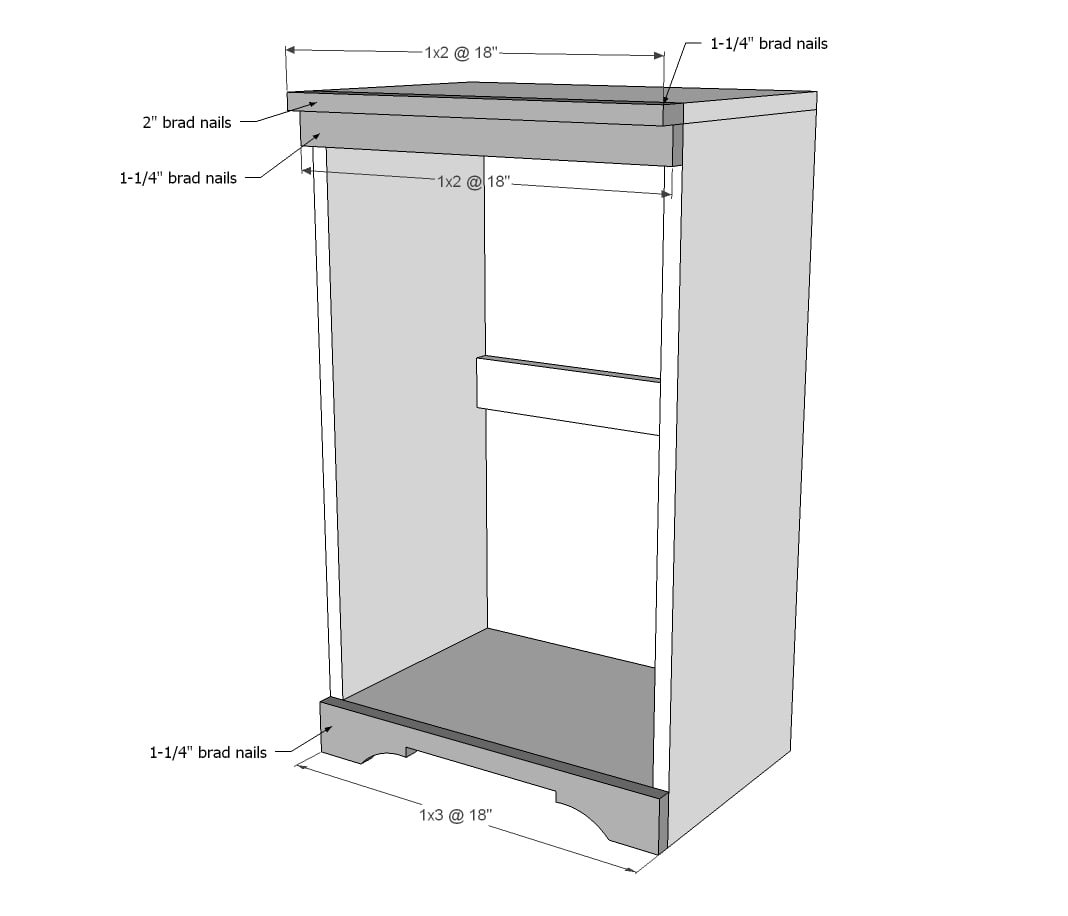
Use either a Kreg Jig or 2" screws or brad nails to build your box as shown above. The bottom shelf is 2 1/2" from the bottom, at the top. So leave 1 3/4" gap underneath the bottom shelf. Check for square.
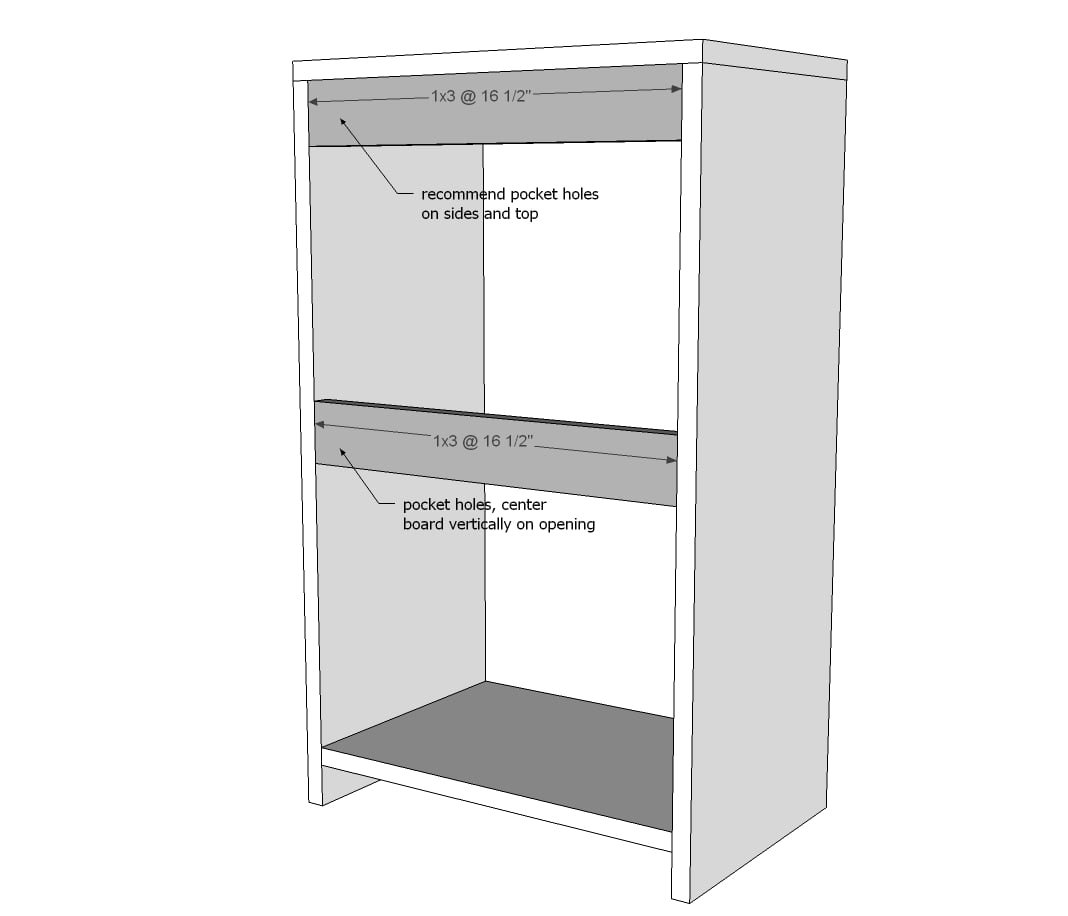
Once your box is done, attach back supports to keep the project square.
NOTE: If you would like to access your trash from the back to remove, hold off on placing the center back support until after you install the tilt out door.
Step 3
Attach front trim with brad nails to the front of the cabinet.
Step 4
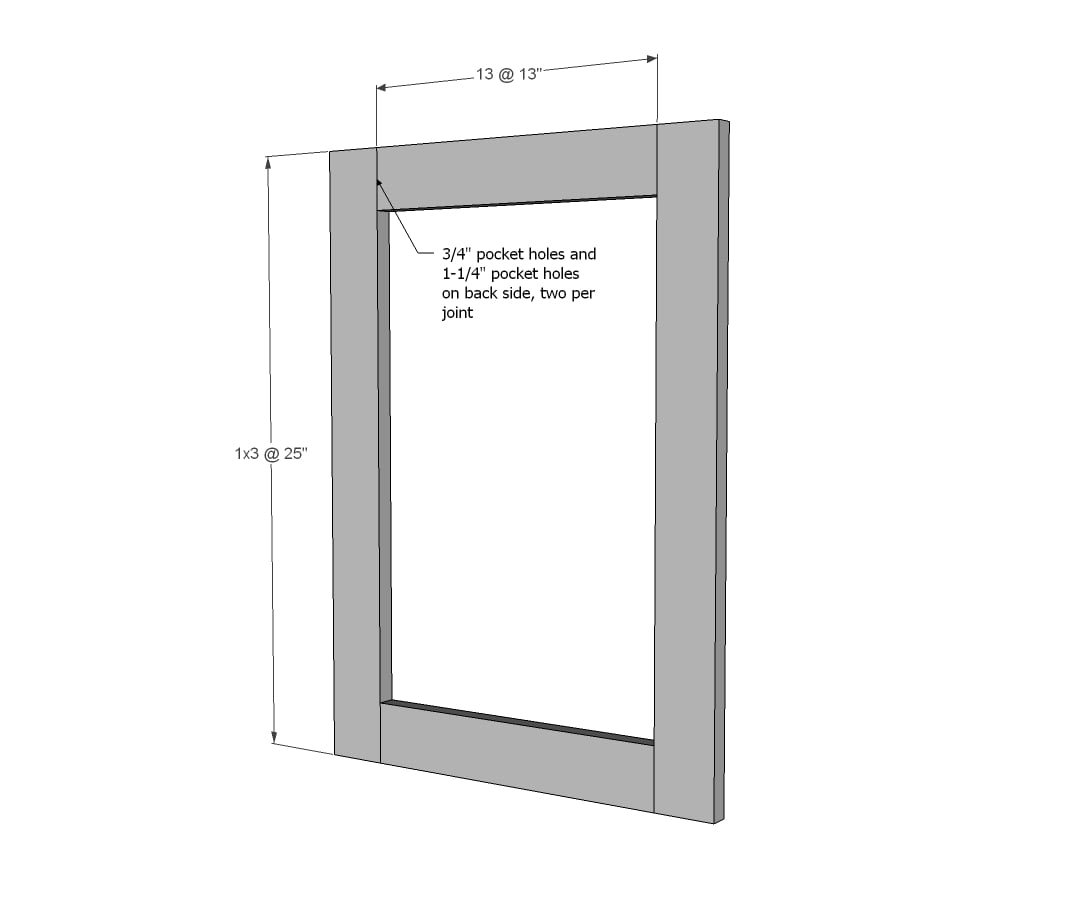
Build the door frame with 1x3s using pocket holes.
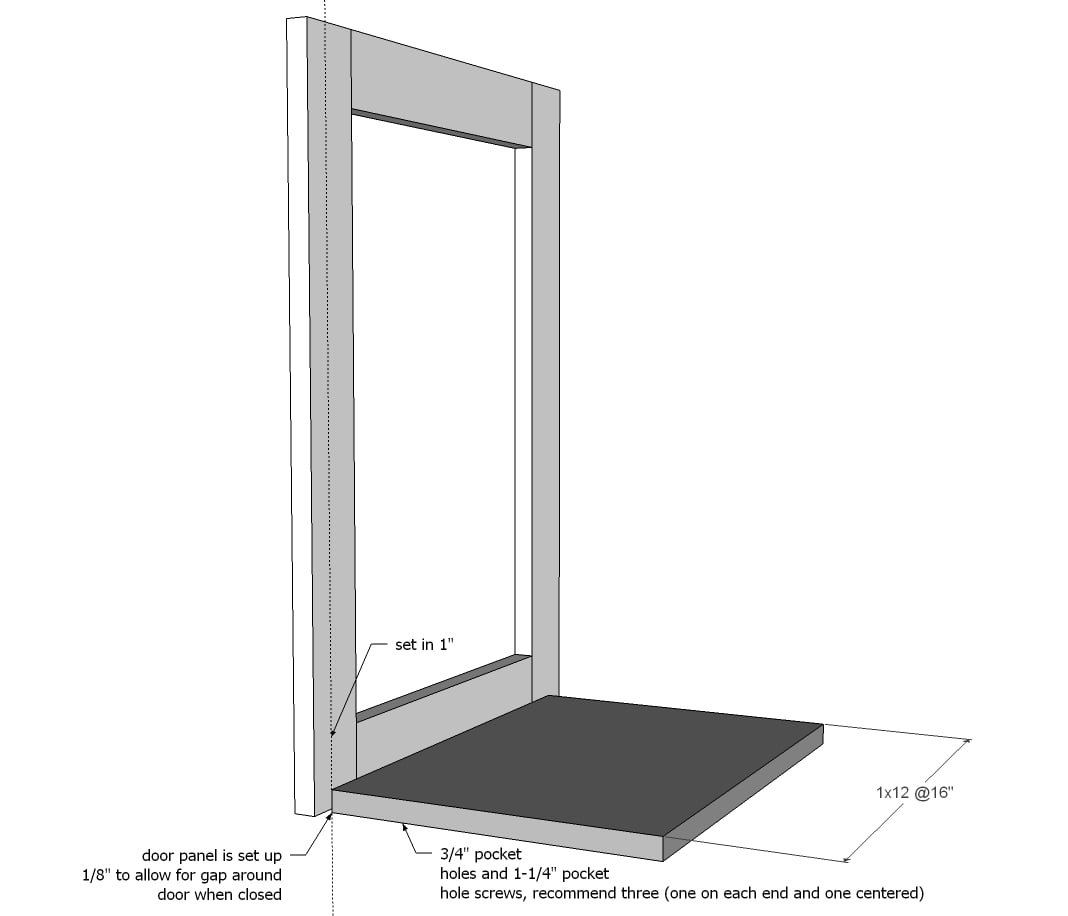
Drill pocket holes along bottom edge of 1x12 bottom piece.
Attach to the frame, inset 1" from edges, but held low 1/8" on bottom edge, with 1-1/4" pocket hole screws.
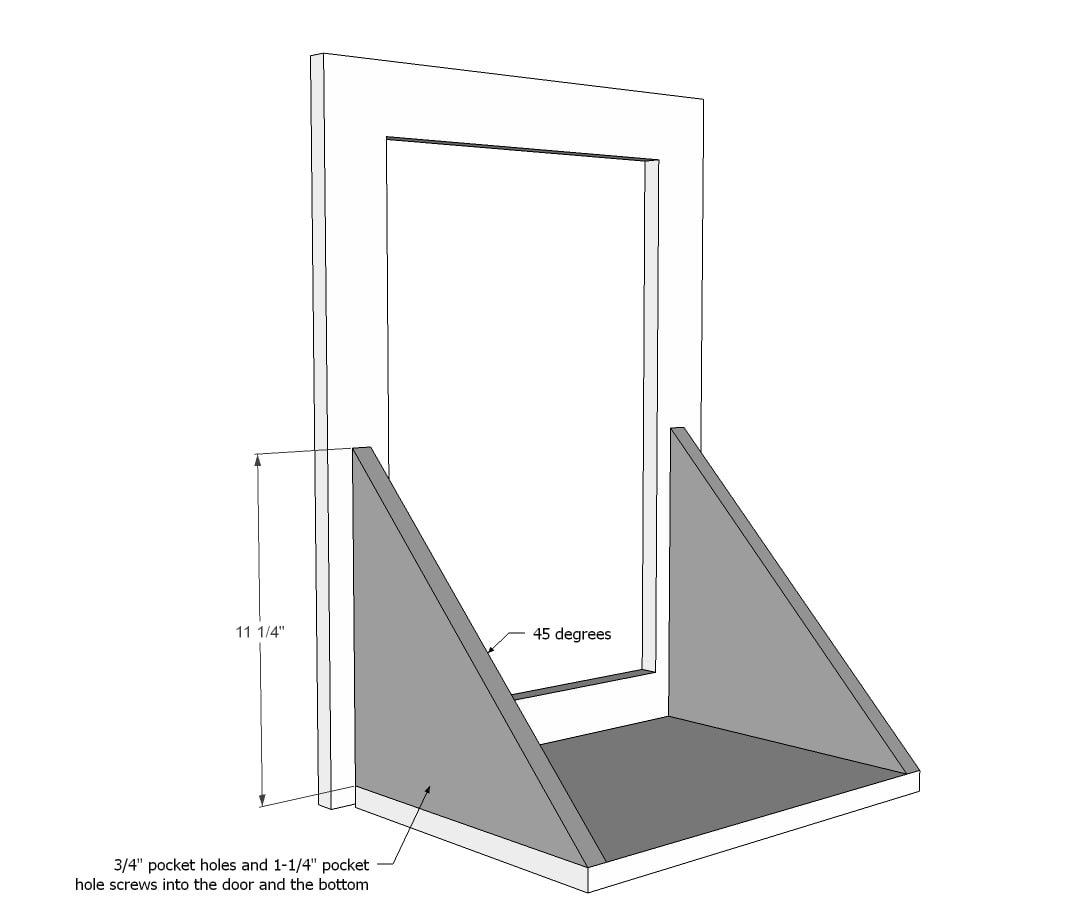
Cut the sides at a 45 degree angle.
Drill two pocket holes on sides. Attach to door panel and to the bottom.
Step 7
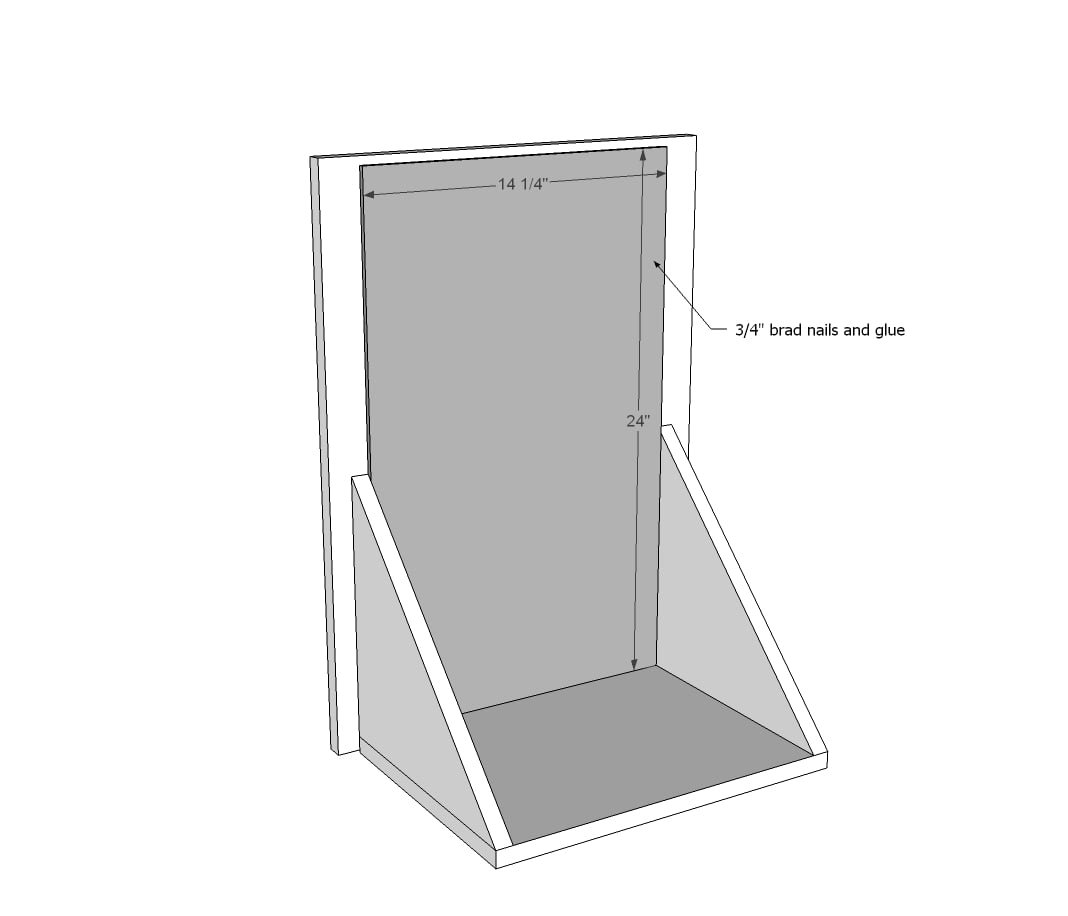
Cut the 1/4" plywood panel to fit inside the door panel. Attach with 3/4" brad nails and glue.
Step 8
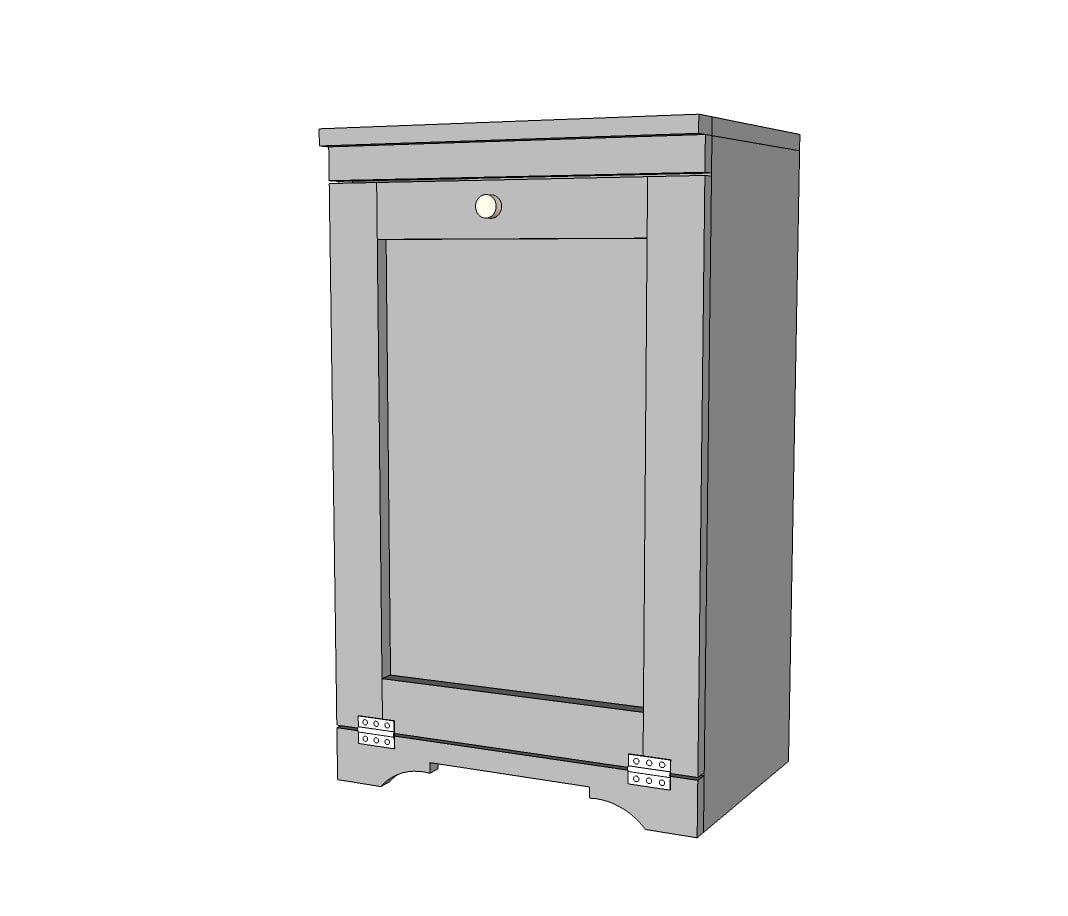
Hinge the door to the cabinet. For our tilt out trash cabinet/recycle center, we didn't even have to worry about a magnetic catch - the weight of the tilt out base keeps everything closed nicely. However, you may need to install either hardware or a chain to keep the tilt out door from opening all the way and bruising your toes.
Finishing
Sand all surfaces, starting with a medium grit and finishing with fine. Wipe off the dust, fill any holes or gaps with wood filler, and sand smooth once dry. Apply primer if you're painting, then finish with your choice of paint or stain and seal with a durable clear topcoat. For outdoor projects, use exterior-rated primer, paint or stain, and sealer so the piece stands up to the weather.
Source (temporary): https://www.ana-white.com/woodworking-projects/wood-tilt-out-trash-or-recycling-cabinet