Wood Toolbox
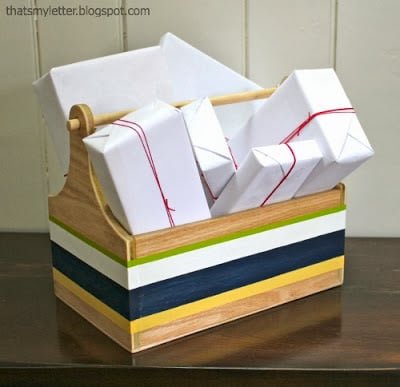
How about a toolbox that looks good on the shelf, so you don't have to hide it at the back of a closet? This wood toolbox is inspired by vintage wood toolboxes, and features a large, roomy compartment, it will hold up to use and store all your tools with style. from, include detailed diagrams, shopping and cut list!
Specifications
| Project type | Toys |
|---|---|
| Room | Storage Solutions |
| Style | Children's and Kid's Room Furniture and Toy Plans |
| Difficulty | Beginner Projects |
Dimensions
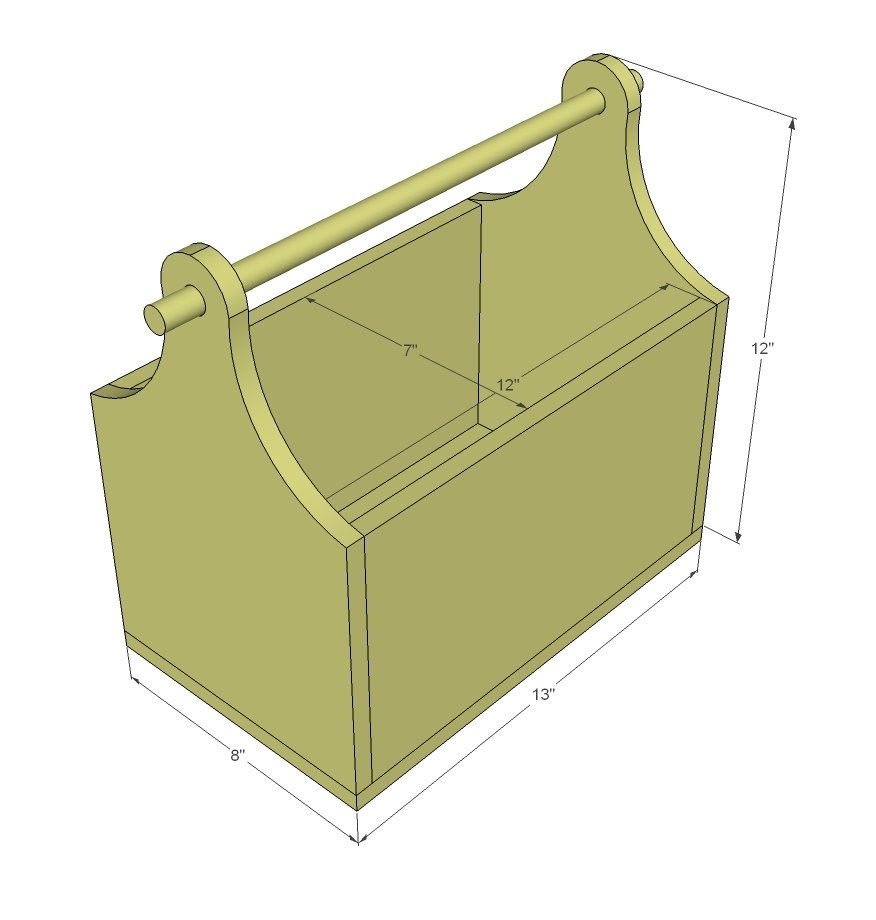
Use the size-specific shopping and cut lists below.
Shopping List
Construction with plywood as shown in photos and diagrams
- 12" x 32" of 1/2" plywood
- 13" x 8" of 1/4" plywood
- 1 - 3/4" dowel 14" long
- 3/16" dowels for handle stoppers
- 1 1/4" brad nails wood glue
Alternative 1x8 Construction
- 1 - 1x8 @ 6 feet long
- 1 - 3/4" dowel at 16" long
- 1-1/4" brad nails
- wood glue
Cut List
Cut List Using Plywood Pieces
- 2 - 1/2" plywood 12" x 7" (sides)
- 2 - 1/2" plywood 12" x 8" (ends)
- 1 - 1/4" plywood 13" x 8" (base)
- 1 - 3/4" dowel @ 14" (handle)
- 2 - 3/16" dowel @ 1 1/4" (handle stoppers)
Cut List Using 1x8 Boards
- 1 - 1x8 @ 13" - bottom
- 2 - 1x8 @ 12" - ends
- 2 - 1x8 @ 14-1/2" - sides
- 1 - 3/4" dowel @ 16" - handle (can also use a 1x2 cut to 13")
Tools
- measuring tape
- square
- pencil
- safety glasses
- hearing protection
- jigsaw
- nailer
- sander
Step-by-step Instructions
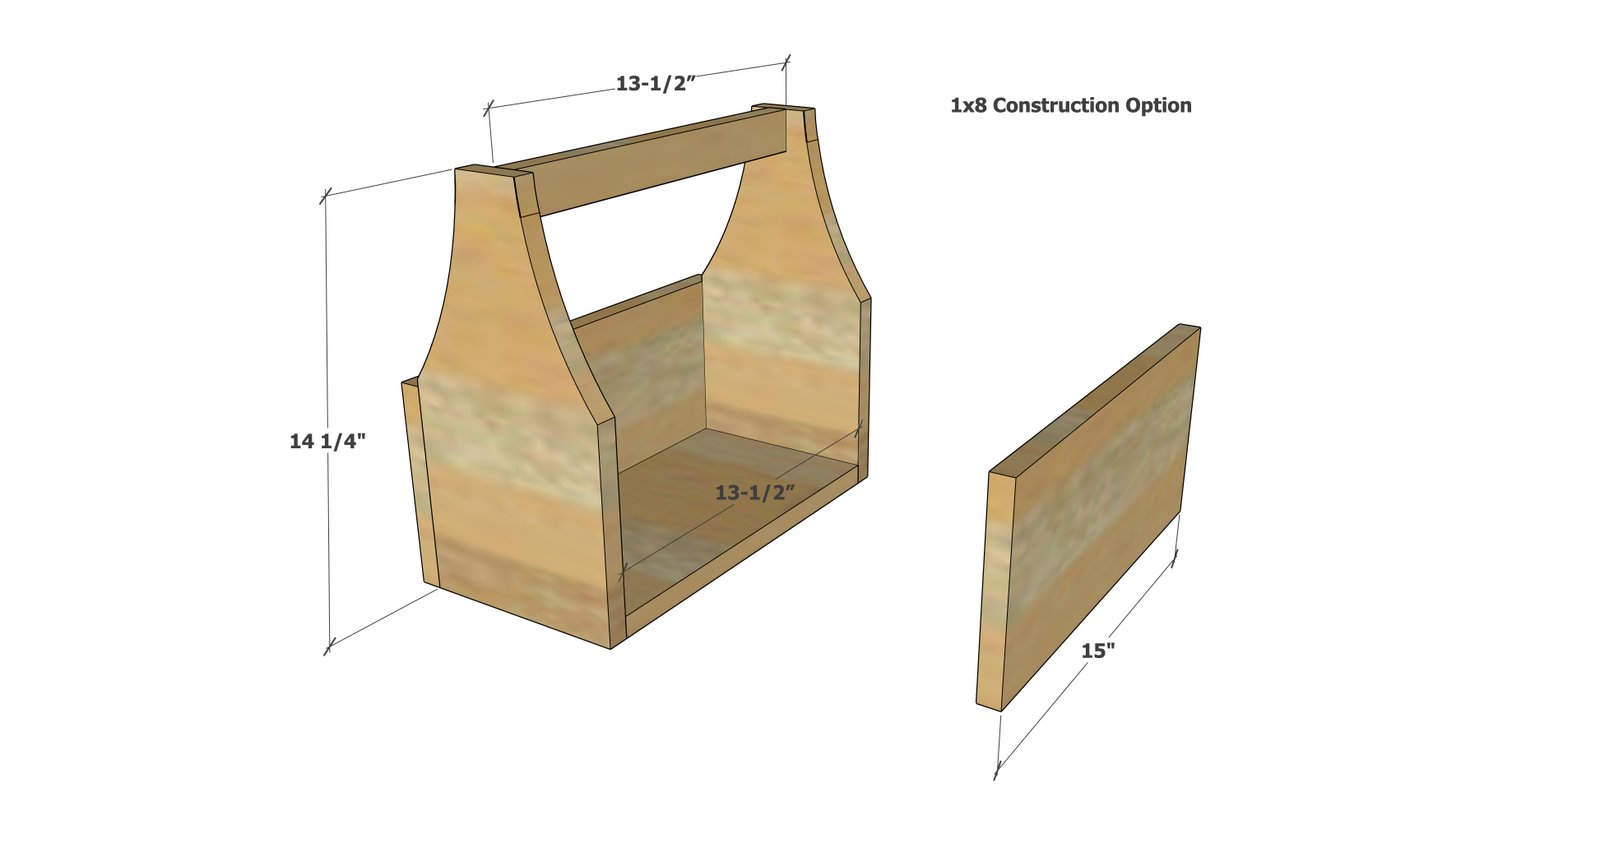
1x8 Construction option
Attach the bottom to the two ends with 1-1/4" brad nails and glue. Then mark out the sides on the ends, and cut out the ends to allow for easy reaching inside the toolbox with a jigsaw. Attach the sides with glue and 1-1/4" brad nails. Use a wood dowel or 1x2 for the handle.
Step 2
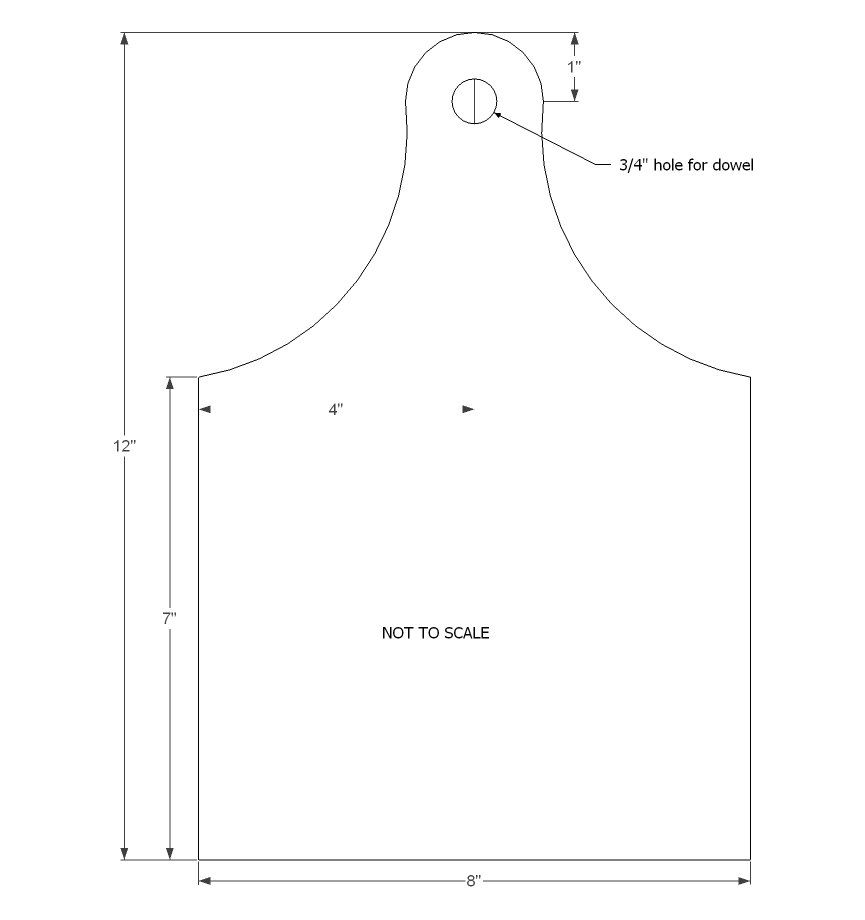
Once you get all your 1/2" plywood pieces cut, it's time to cut those ends into the trug shape. You'll need a spade bit to drill the hole for the handle, and then a round object to help you shape the curved sides like Jaime did here: Once you get one end done, use it as a pattern to cut the other end.
Step 3
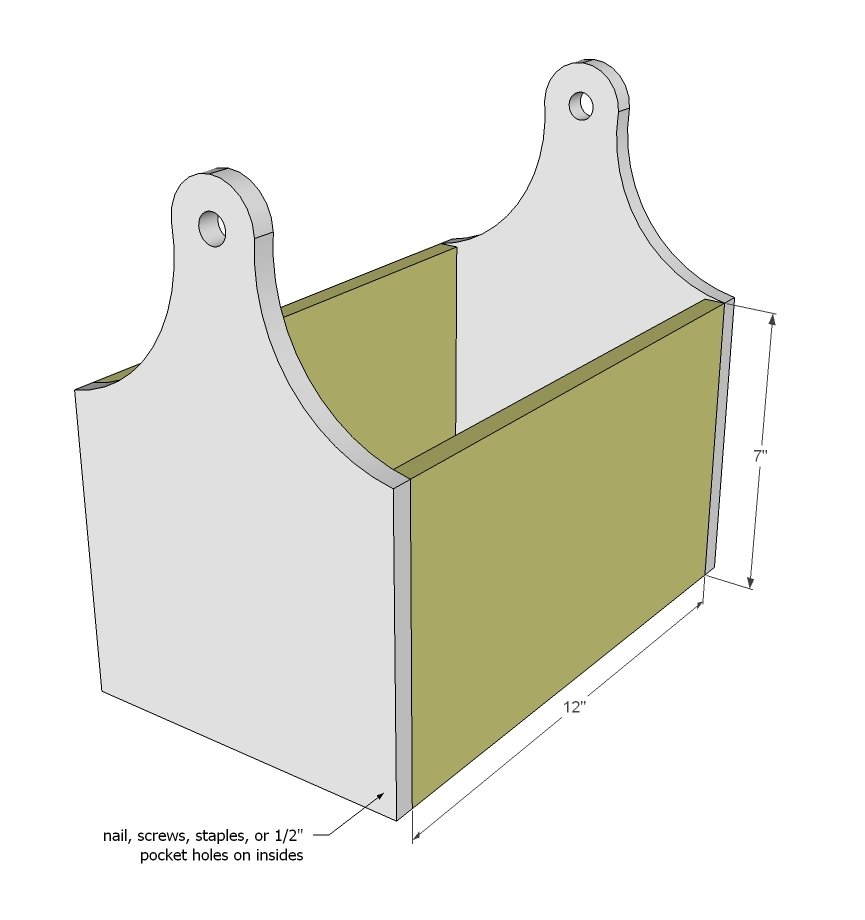
With the sides done, nail to the sides with 1 1/4" nails with glue.
Step 4
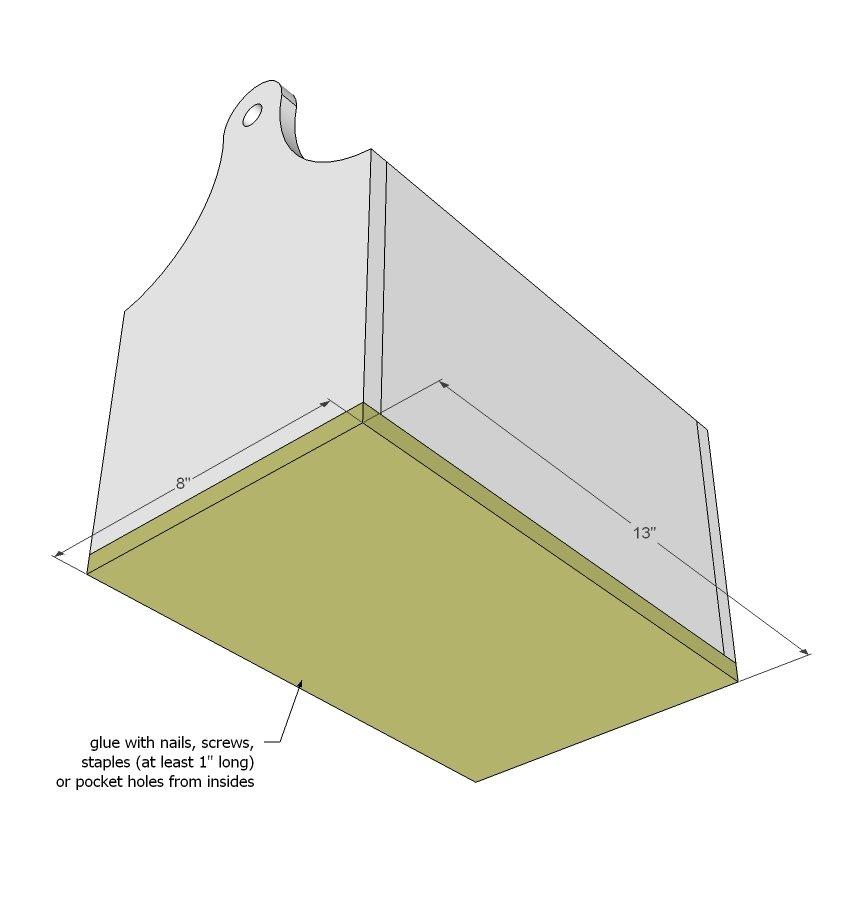
Then attach the bottom with glue and nails.
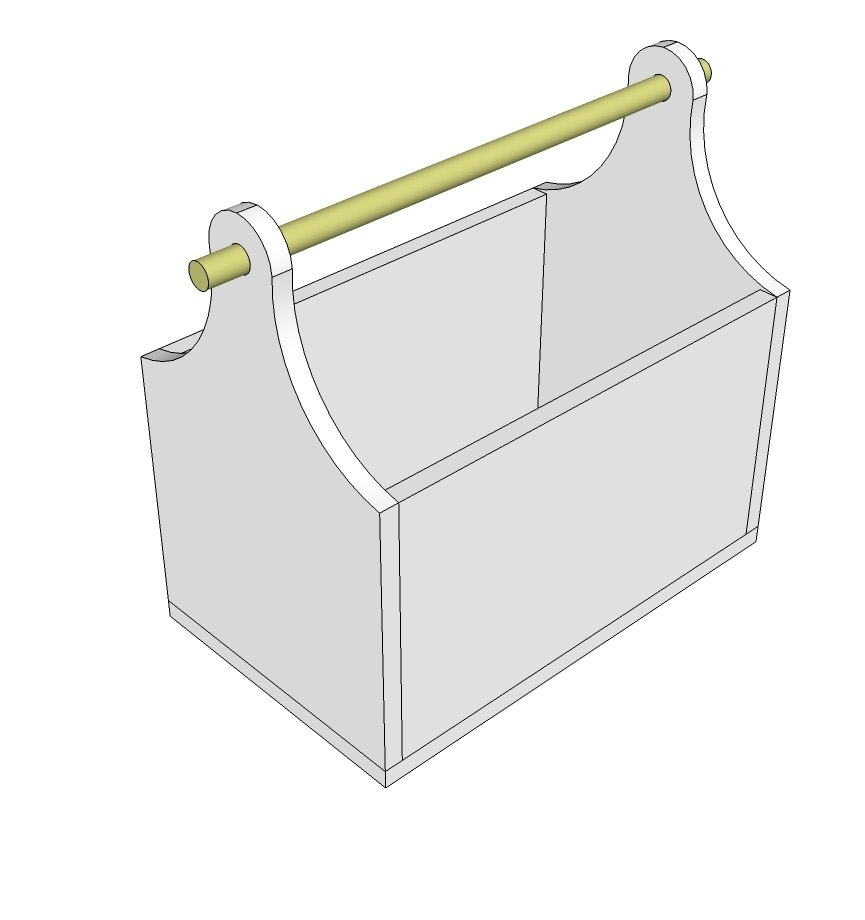
Then insert the wood dowel for the handle.
Jaime recommends adding smaller dowels to keep the handle in place as well.
Finishing
Sand all surfaces, starting with a medium grit and finishing with fine. Wipe off the dust, fill any holes or gaps with wood filler, and sand smooth once dry. Apply primer if you're painting, then finish with your choice of paint or stain and seal with a durable clear topcoat. For outdoor projects, use exterior-rated primer, paint or stain, and sealer so the piece stands up to the weather.
Source (temporary): https://www.ana-white.com/woodworking-projects/wood-toolbox-plans