Wood Wine Holder
This little wood wine holder stacks, stores, and you can use the top to serve! It works as a gift box too for the wine lover. Quick and easy DIY project that you can build with off the shelf pine boards and nail together. Step by step plans from
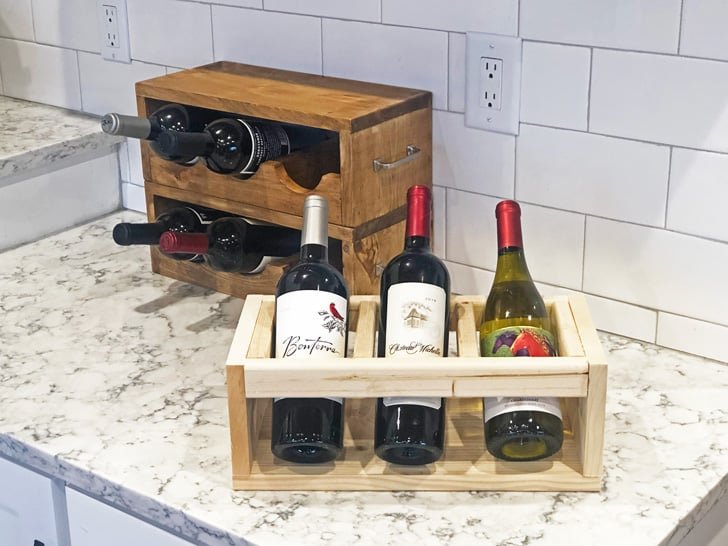
Specifications
| Project type | Kitchen Cabinet Plan, Accessories and Serving |
|---|---|
| Room | dining room |
| Style | Farmhouse Furniture |
| Difficulty | Beginner Projects |
| Estimated cost | Under $20 |
Dimensions
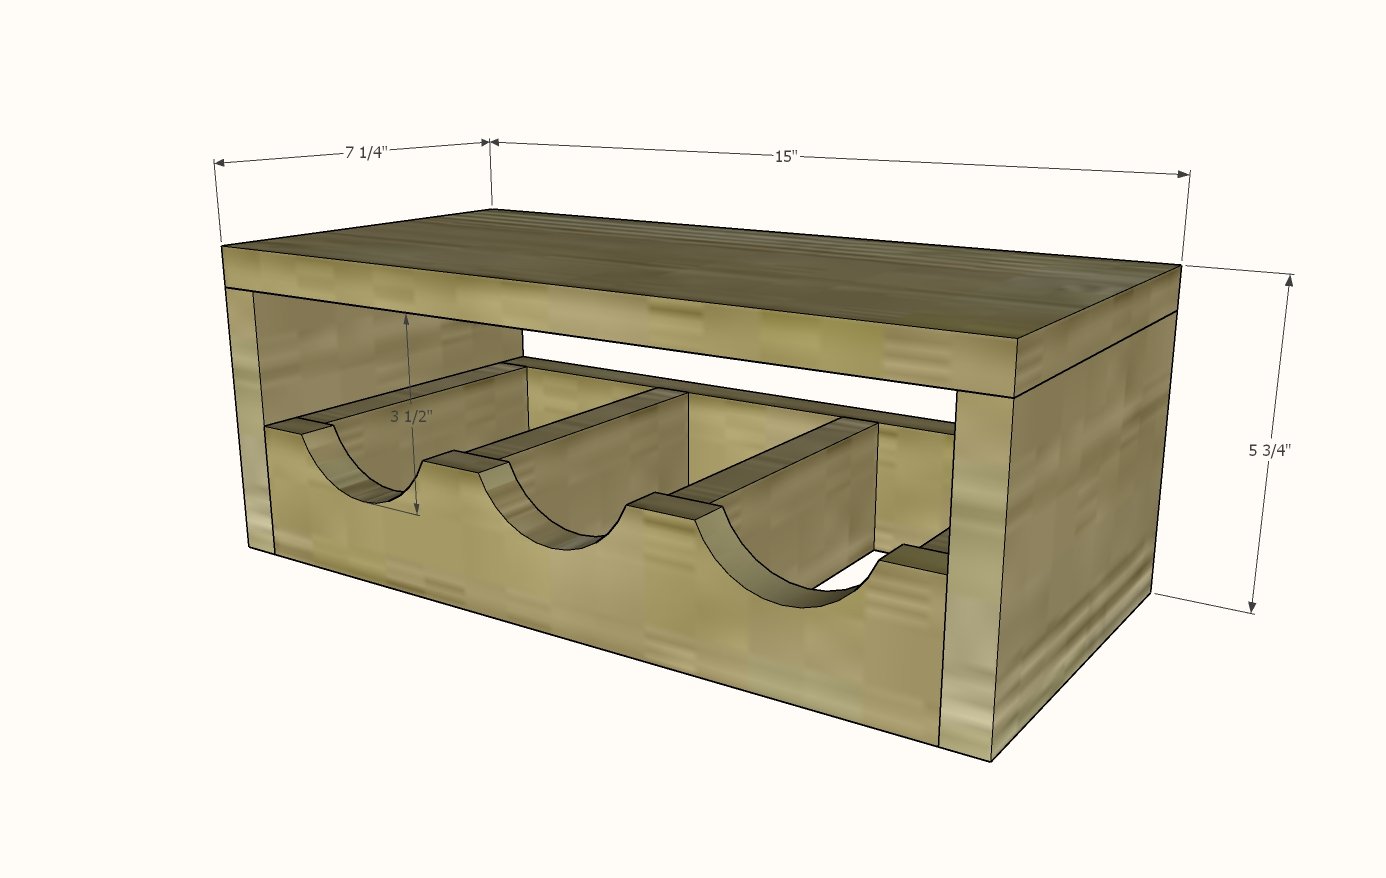
Use the size-specific shopping and cut lists below.
Shopping List
- 25 inches (a little more than 2 feet) of 1x8 board (can be in smaller pieces if using up scrap wood)
- 50 inches (a little more than 4 feet) of 1x3 board (also can be smaller piece if using up scrap wood)*
- 1 - 1/4" brad nails
- wood glue
- scroll blade for jigsaw recommended
*Can substitute for 1x2s and not cut out the arches for the wine bottles
Cut List
- 2 - 1x8 @ 5"
- 1 - 1x8 @ 15"
- 2 - 1x3 @ 13-1/2"
- 4 - 1x3 @ 5-3/4"
Tools
- measuring tape
- square
- pencil
- safety glasses
- hearing protection
- jigsaw
- compound miter saw
- nailer
- sander
Step-by-step Instructions
Step 1
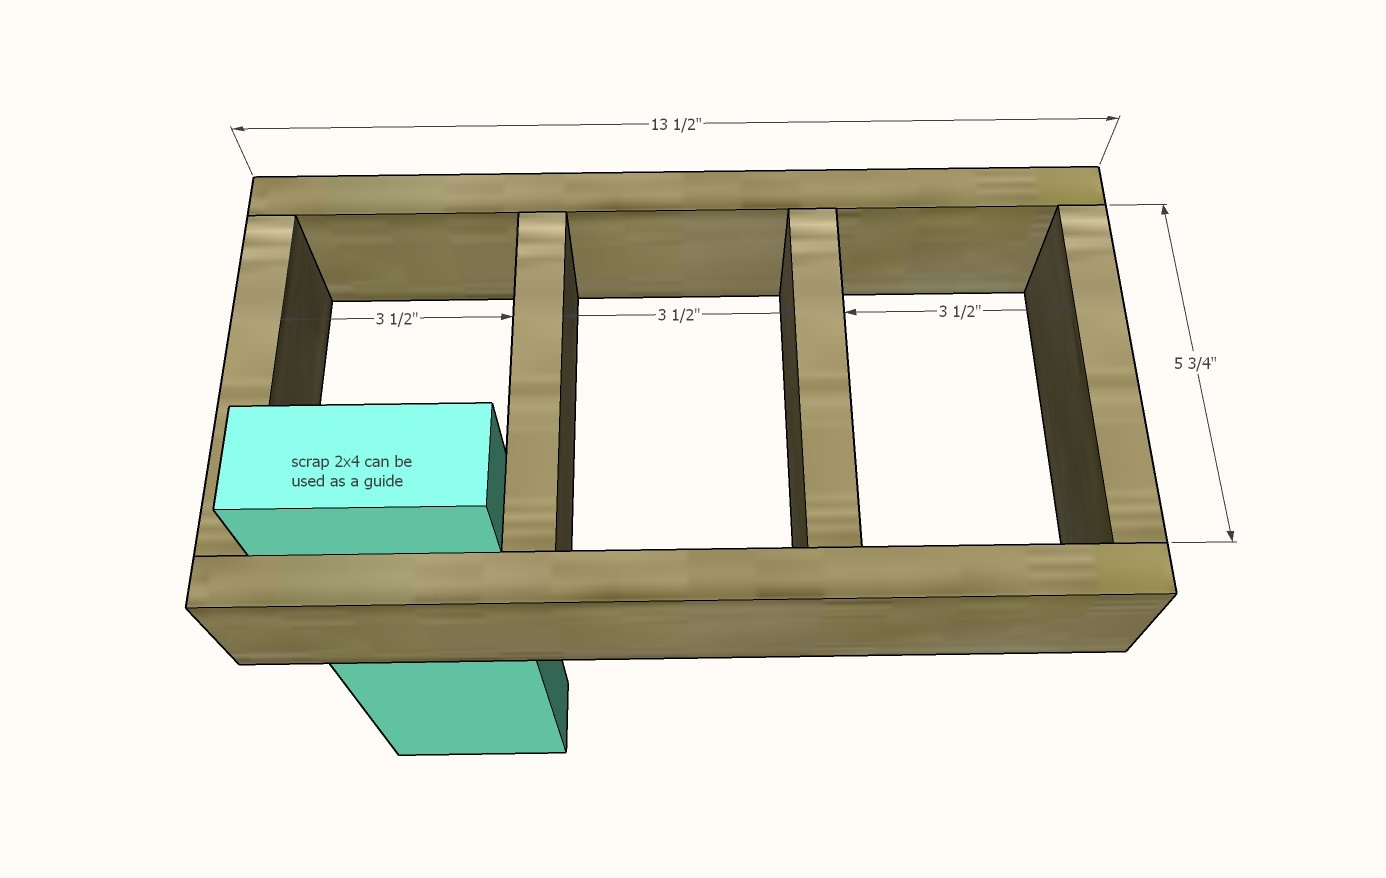
Attach the 1x3 (or 1x2 if using) boards together with 1-1/4" brad nails and wood glue.
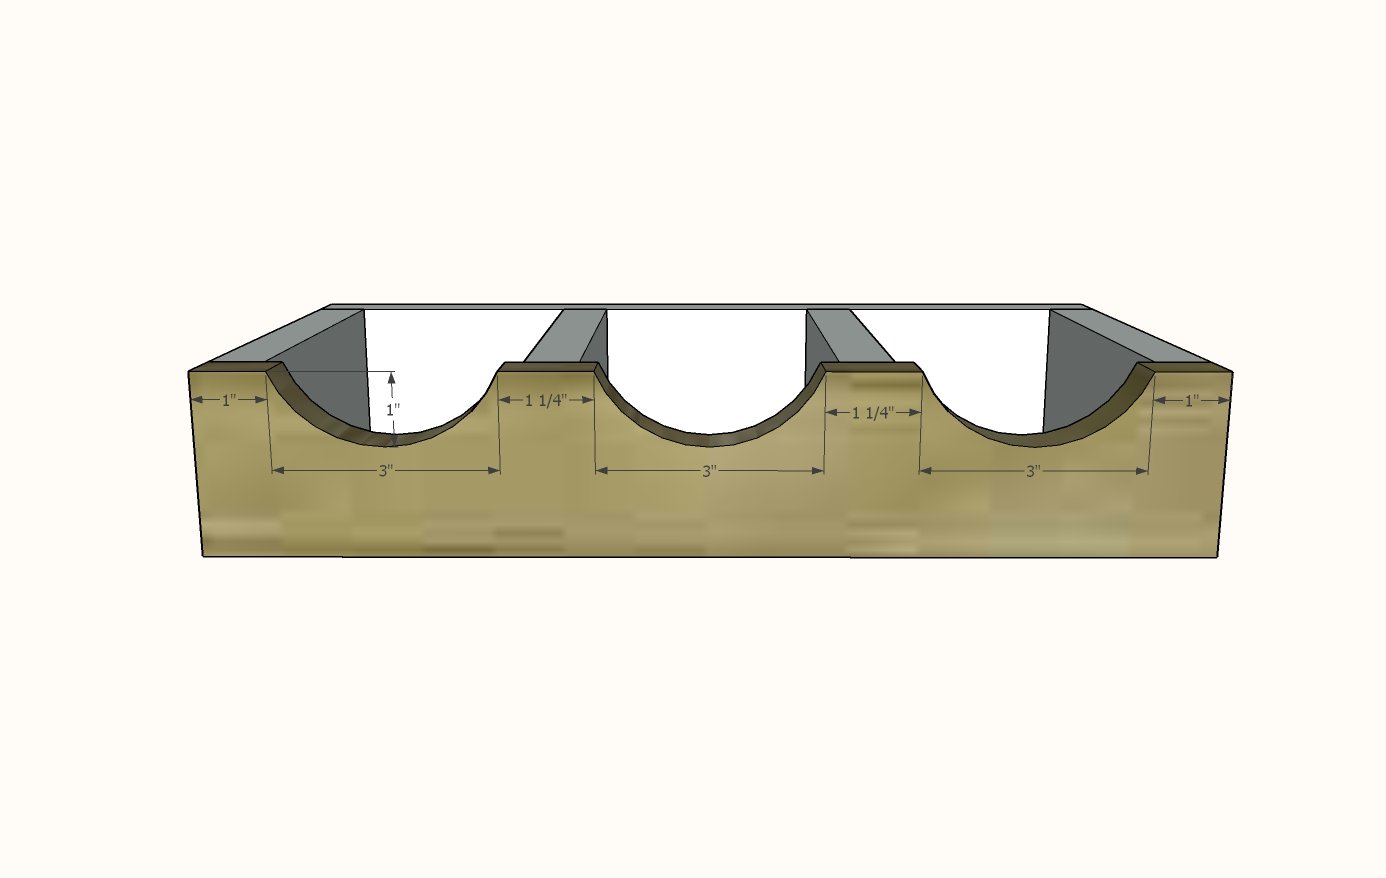
Mark the front 1x3 with a pencil. Use a round object to trace out the curves.
Clamp the lower 1x3 to a sturdy surface. Cut out with a jigsaw. Sand rough edges smooth. NOTE: If using 1x2s skip this step.
Attach the sides to the top with 1-1/4" brad nails and wood glue.
Make sure this part sets level on a level surface.
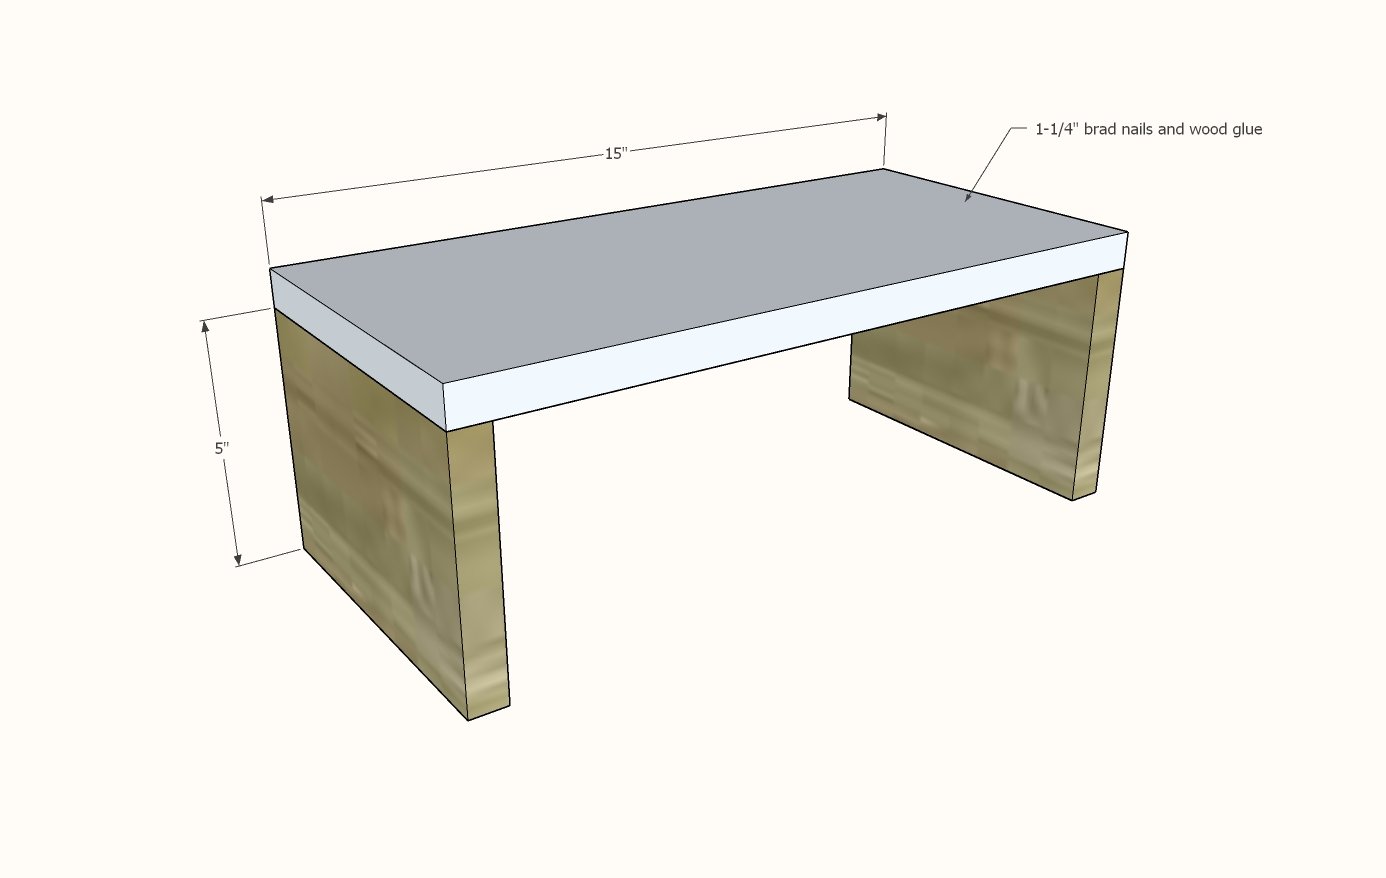
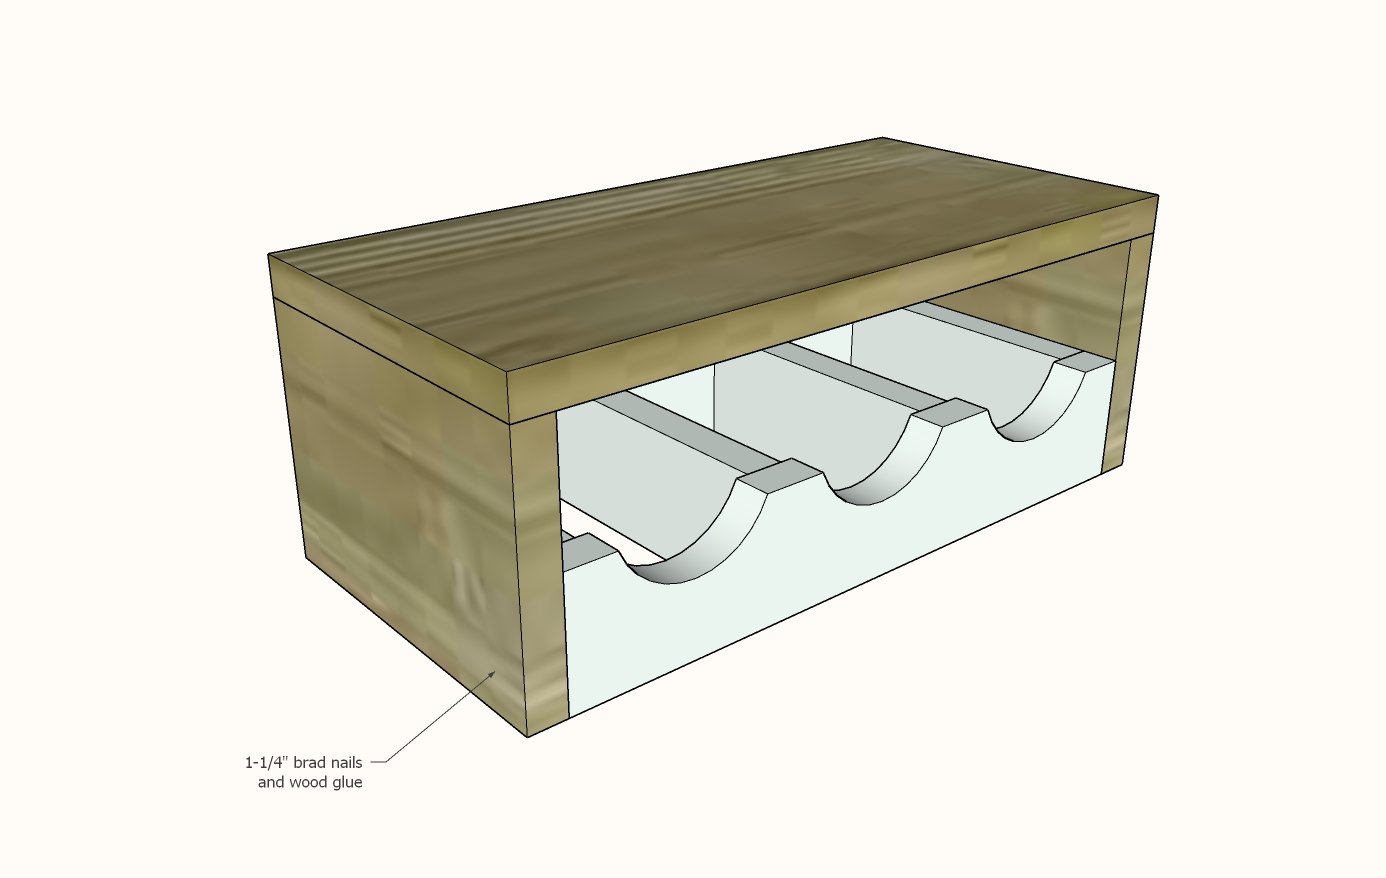
Fit the wine storage into the outer frame and make sure the project sits level on a level surface.
Attach with glue and 1-1/4" brad nails. You can add handles at this step.
Finishing
Sand all surfaces, starting with a medium grit and finishing with fine. Wipe off the dust, fill any holes or gaps with wood filler, and sand smooth once dry. Apply primer if you're painting, then finish with your choice of paint or stain and seal with a durable clear topcoat. For outdoor projects, use exterior-rated primer, paint or stain, and sealer so the piece stands up to the weather.
Source (temporary): https://www.ana-white.com/woodworking-projects/wood-wine-holder-stacks-stores-and-serves