Wooden Ladder Shelf
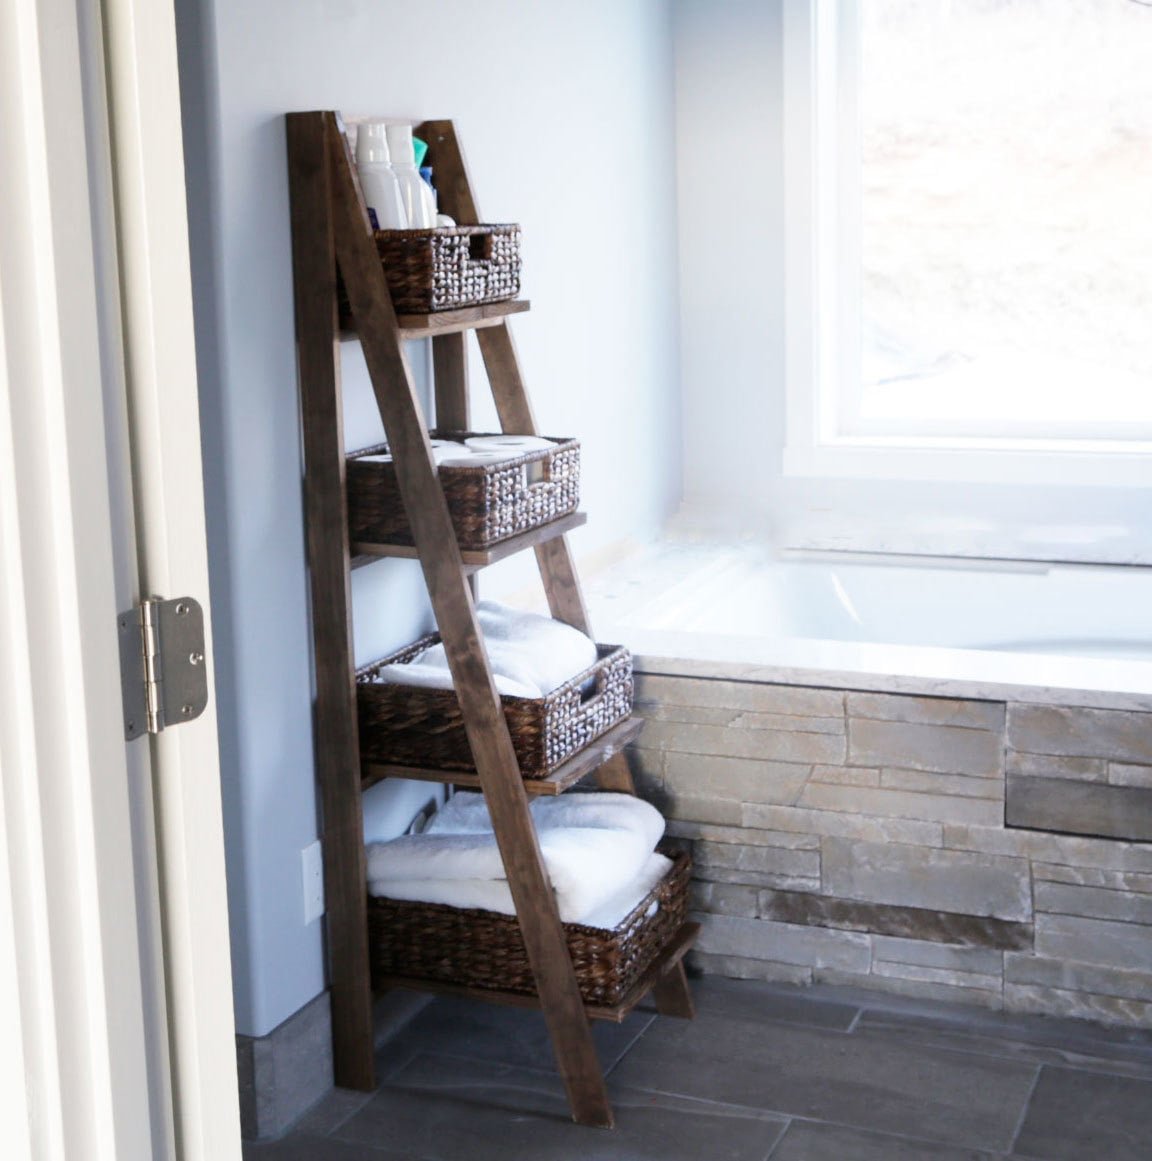
Build your own wooden ladder shelf with just 1x3s and 1x8s. You can easily customize the size and the finish to fit your home. It's perfect for towels, baskets and toiletries, or throughout your home. with diagrams make it easy. From
Specifications
| Project type | shelves |
|---|---|
| Room | Storage Solutions |
| Style | Farmhouse Furniture |
| Difficulty | Intermediate |
| Estimated cost | $20 - $50 |
Dimensions
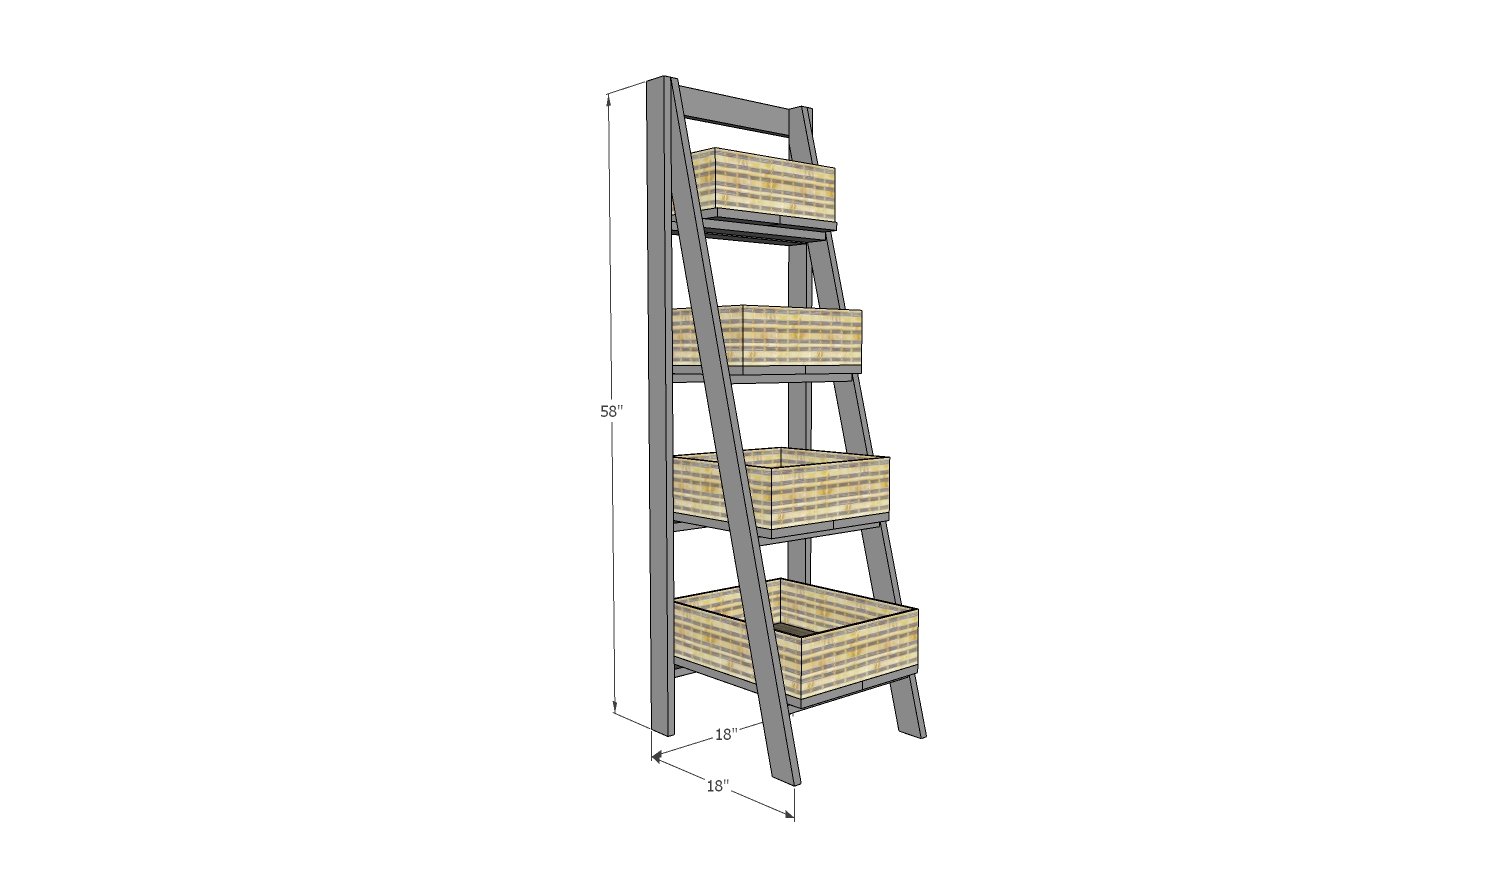
Use the size-specific shopping and cut lists below.
Shopping List
- 5 – 1x3 @ 8 feet long (cut longest cuts first)
- 9 linear feet of 1x8 board
- 1-1/4” pocket hole screws or 2” self tapping screws
- 1-1/4” brad nails or staples
Cut List
- 2 – 1x3 @ 58”
- 4 – 1x3 @ 15”
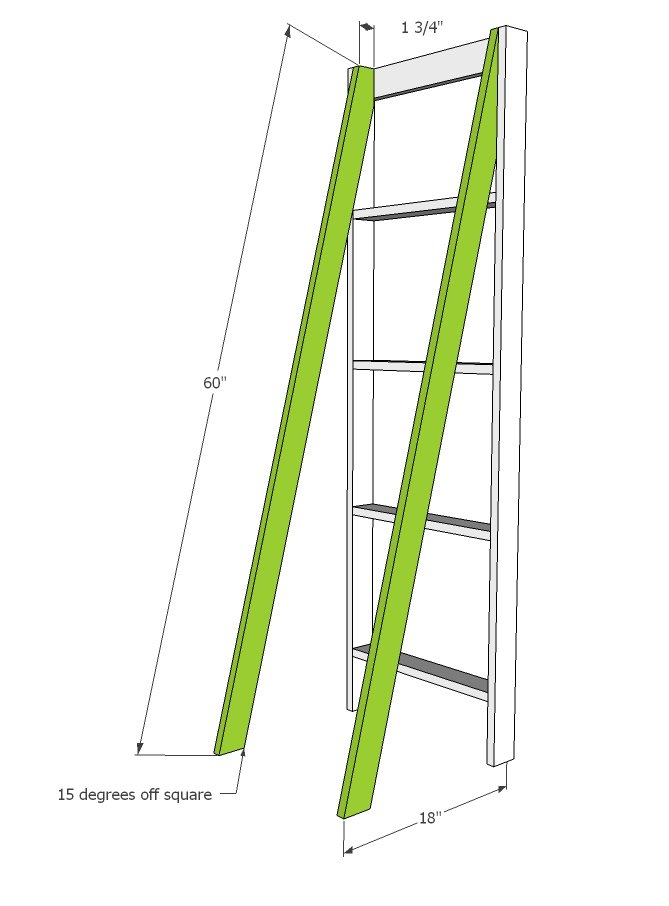
- 2 – 1x3 @ 60” – both ends cut at 15 degrees off square, long point to short point measurement, ends ARE parallel
- 5 – 1x3 @ 16-1/2”
Tools
- measuring tape
- square
- pencil
- safety glasses
- hearing protection
- kreg-jig
- drill
- compound miter saw
- nailer
Step-by-step Instructions
Step 1
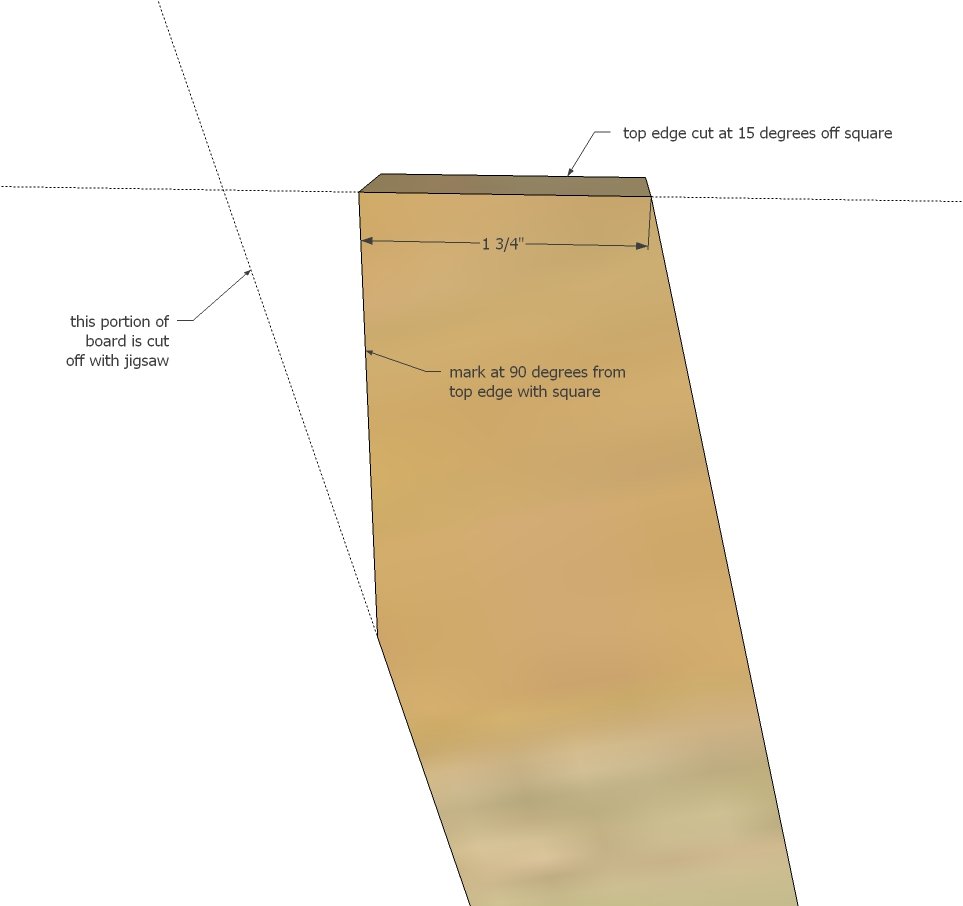
Cut all of your boards according to the cut list. Cut longest lengths first to ensure best use of material. On angled front legs, set miter saw to 15 degrees on the deck, and cut both ends parallel, overall length is measured along same edge, long point to short point. After angled front legs are cut, measure in 1-3/4” from short side and use a square to mark back of leg. Cut off with a jig saw.
Step 2
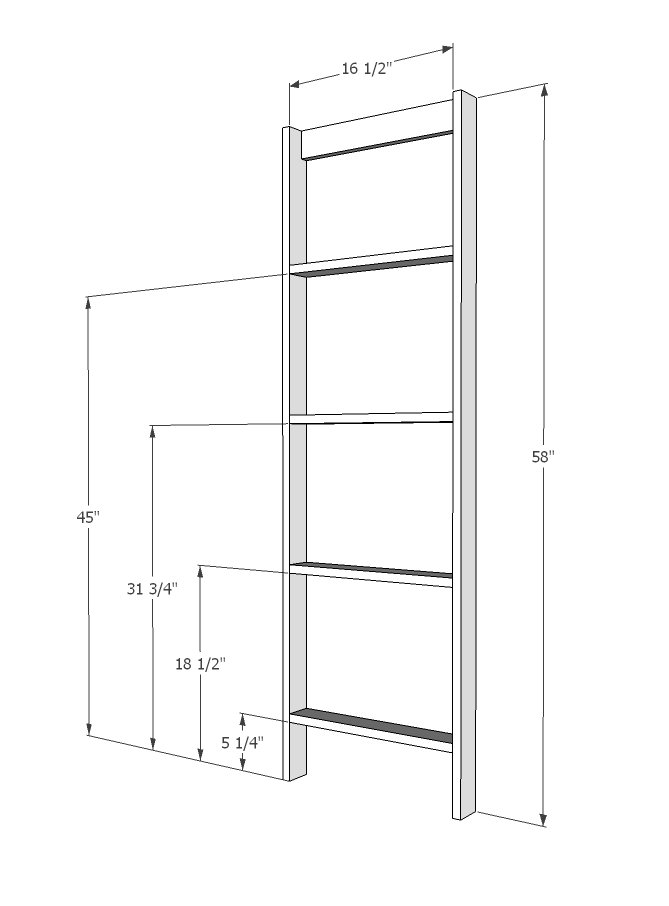
Assemble the back ladder with either 2” self tapping screws or pocket hole screws.
Step 3
Attach front legs to back ladder making sure overall bottom measurement is 18”. Use 1-1/4” screws or brad nails or staples and glue.
Step 4
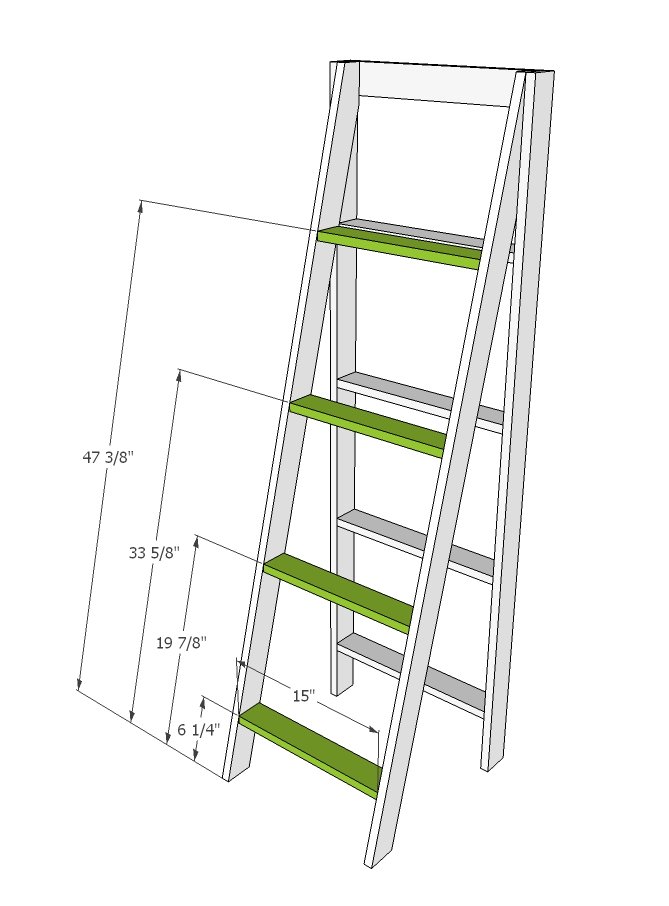
Mark points on front ladder and position front ladder boards in place. Use a level to make sure the boards are attached level to the ground. Attach with pocket holes or 2” self tapping screws.
Step 5
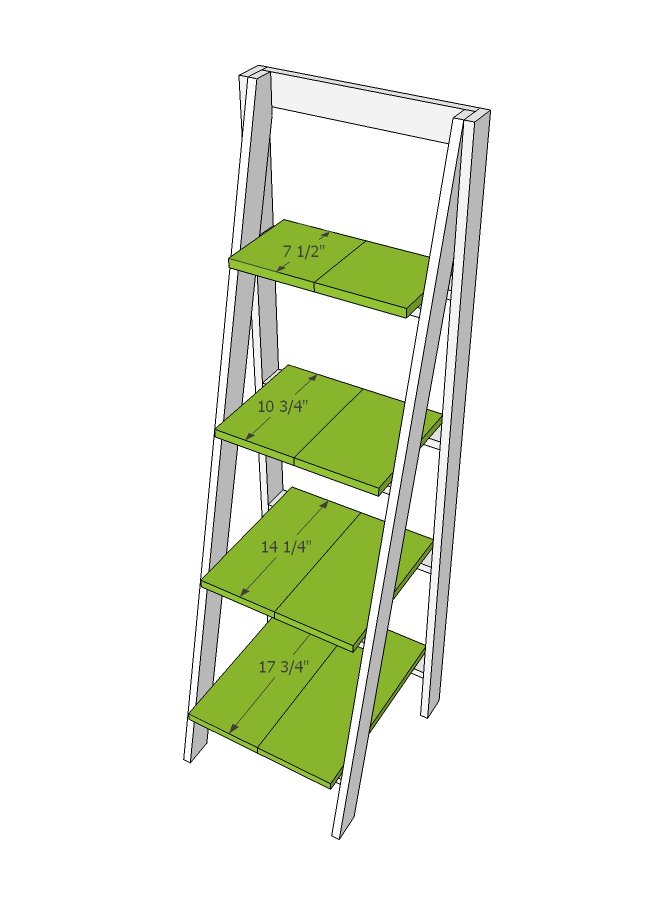
Position shelving boards centered on the ladder pieces and nail or staple down. Use glue and 1-1/4” fasteners.
Finishing
Sand all surfaces, starting with a medium grit and finishing with fine. Wipe off the dust, fill any holes or gaps with wood filler, and sand smooth once dry. Apply primer if you're painting, then finish with your choice of paint or stain and seal with a durable clear topcoat. For outdoor projects, use exterior-rated primer, paint or stain, and sealer so the piece stands up to the weather.
Source (temporary): https://www.ana-white.com/woodworking-projects/wooden-ladder-shelf