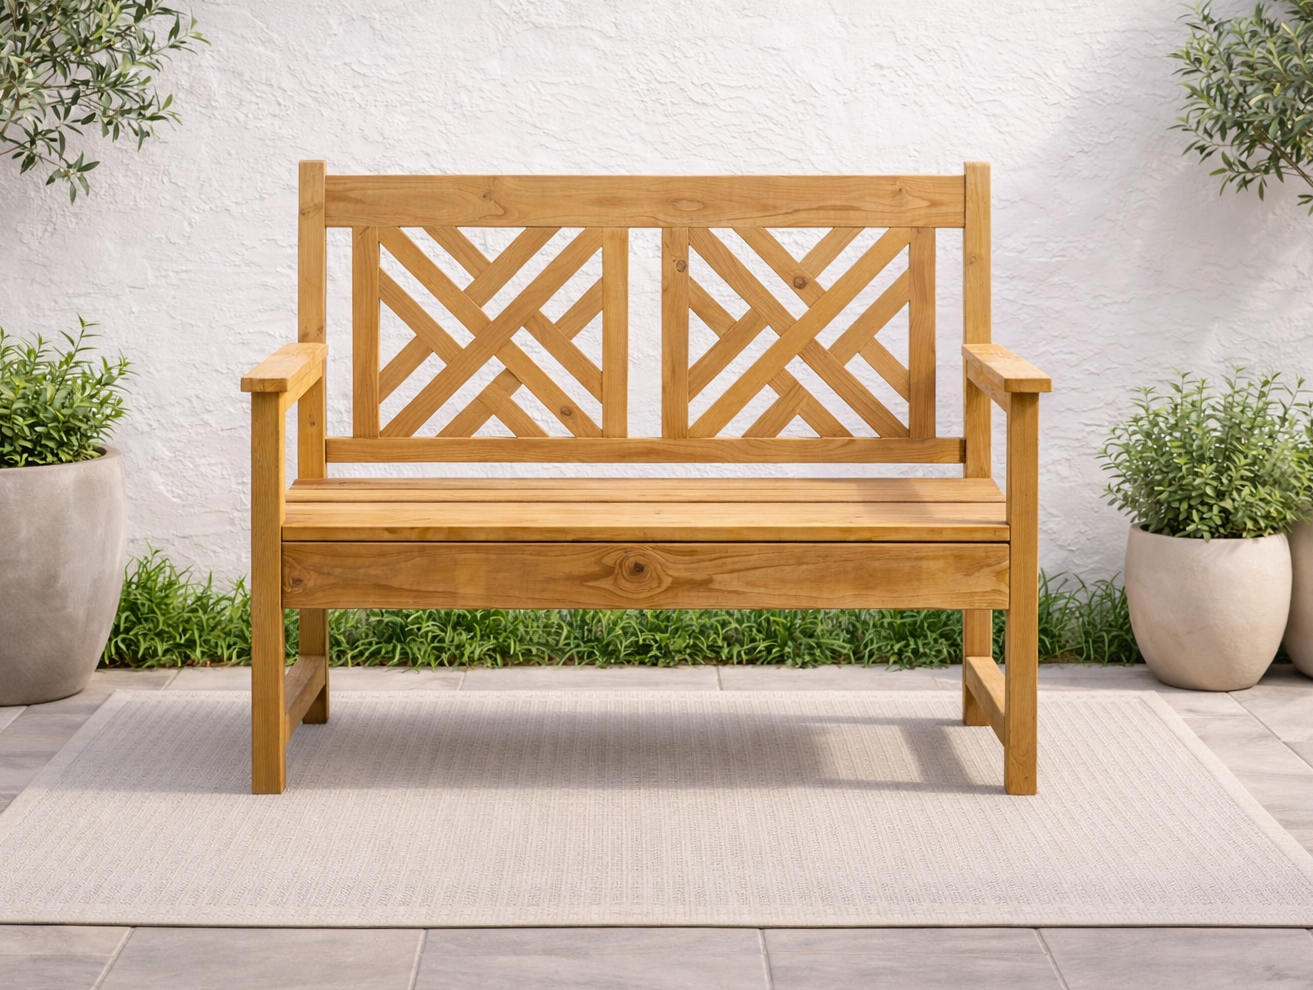
Woven Back Bench
to build a woven back bench from
Specifications
| Project type | Bench |
|---|---|
| Room | Outdoor |
| Style | Cottage Style Furniture Plans |
| Difficulty | Advanced |
Dimensions
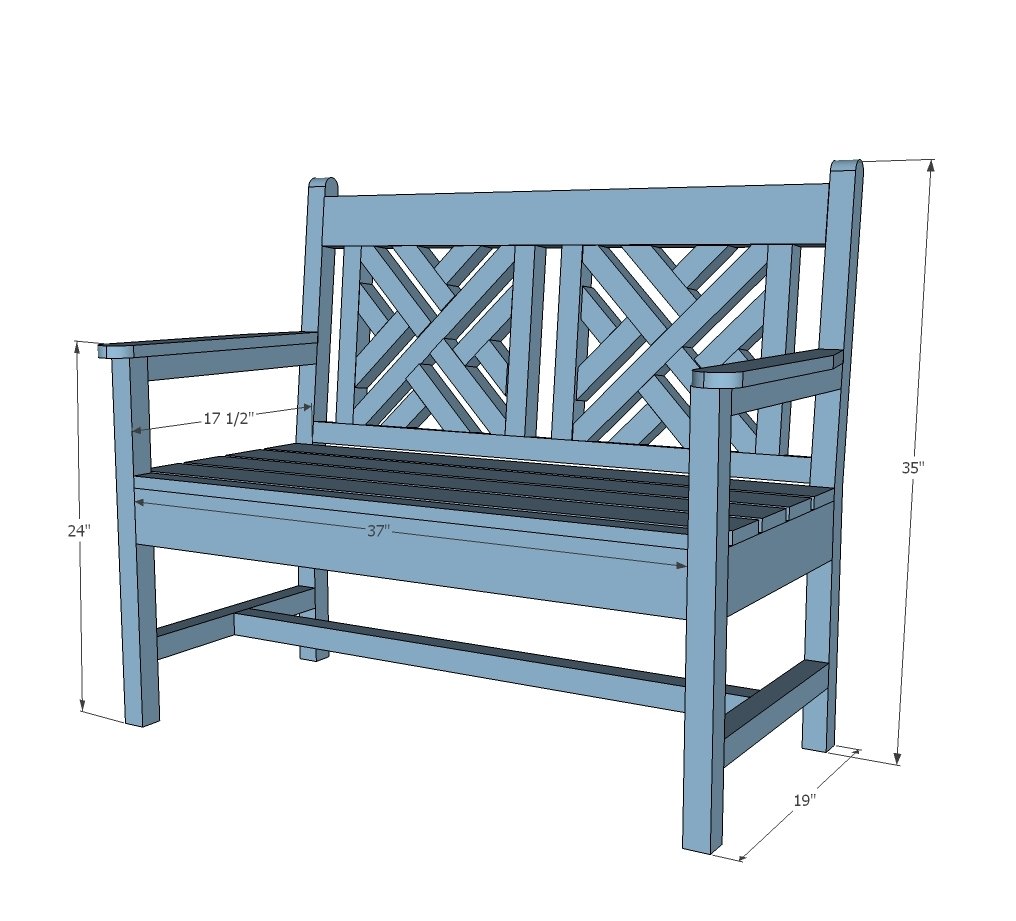
Use the size-specific shopping and cut lists below.
Shopping List
- 3 - 2 x 4 studs
- 6 - 2 x 2 x 8
- 1 - 1 x 4 x 8 (furring strip)
- 1 - 1 x 2 x 8 (furring strip)
- 1 - 1 x 3 x 8 (furring strip)
Cut List
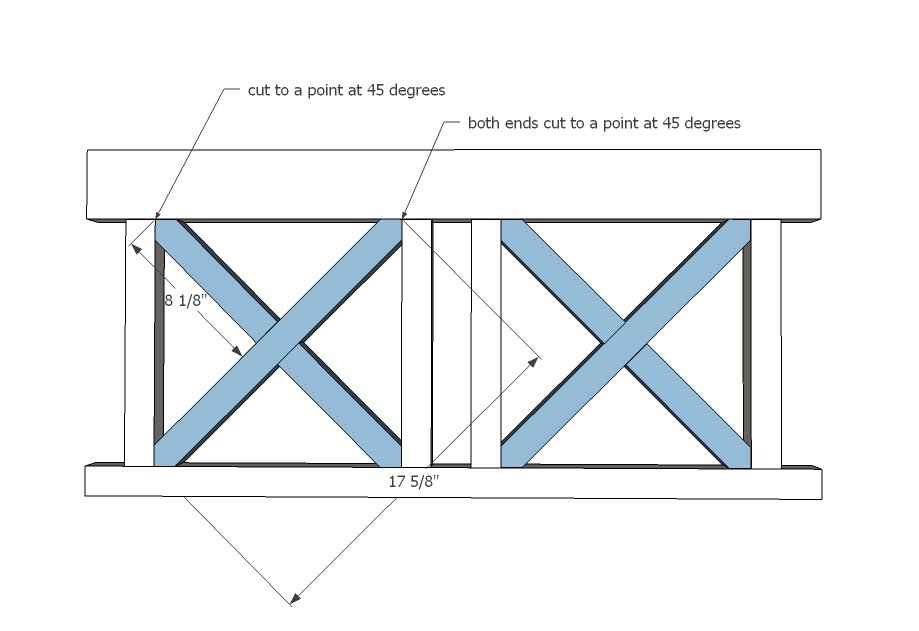
2 - 2x4 @ 35" (backs - cut backs from these) 2 - 2x2 @ 23 1/4" 2 - 2x2 @ 16" 2 - 2x4 @ 16" 2 - 2x2 @ 16 3/4" (longest point measurement, one end cut at 6 degrees off square) 3 - 2x4 @ 37" 2 - 2x2 @ 37" 4 - 2x2 @ 12 1/2" 2 - 2x2 @ 17 5/8" (ends cut to 45 degree points, longest point measurement) 4 - 2x2 @ 8 1/8" (one end cut to 45 degree point, longest point measurement) 8 - 2x2 @ 6 1/4" (longest point measurement, one end cut at 45 degrees off square) 8 - 2x2 @ 3 5/8" (longest point measurement, one end cut at 45 degrees off square) 4 - 1x4 @ 40" 1 - 1x2 @ 37"
Tools
- measuring tape
- square
- pencil
- safety glasses
- hearing protection
- kreg-jig
- drill
- circular saw
- jigsaw
- compound miter saw
- sander
- countersink drill bit
Step-by-step Instructions
Step 1
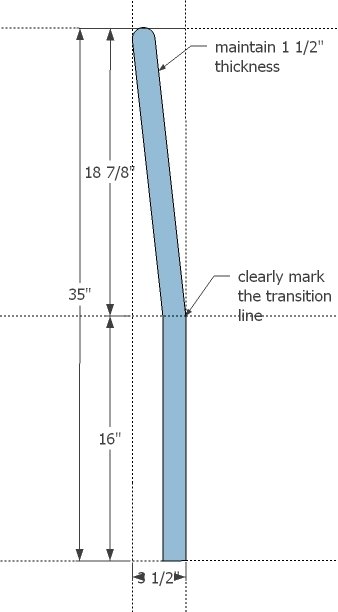
Start by cutting the back legs out. I recommed cutting the long straight cuts with a circular saw, and then finishing the cuts with a handsaw or jigsaw, but you could make the entire cuts with a jigsaw as well. Just make sure you have the right blade, it's sharp, and you go slow and sand the cut edge well. You'll need to cut two. Make sure you mark the boards as shown in diagram before cutting.
Step 2
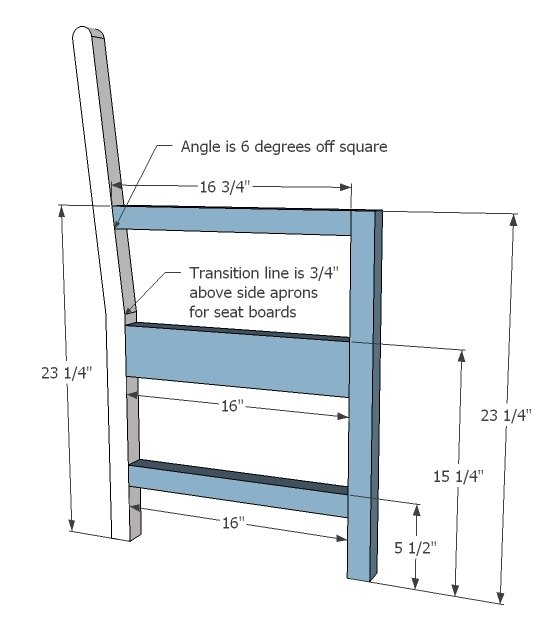
Next, add to the back legs the front legs, seat support, arm rest support and bottom stretcher. Make two and make sure they match. Easiest way is 1 1/2" pocket holes and 2 1/2" pocket hole screws and glue but countersunk screws could work too. If using pocket holes, try hiding on underside whenever possible to prevent water pooling in your pocket holes.
Step 3
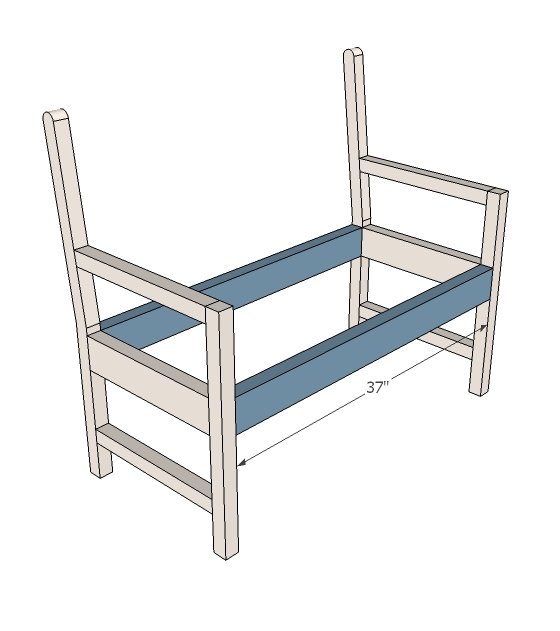
Once you have the two legs done, join together with 2x4s. With the bench frame complete, let's set aside and work on the back.
Step 4
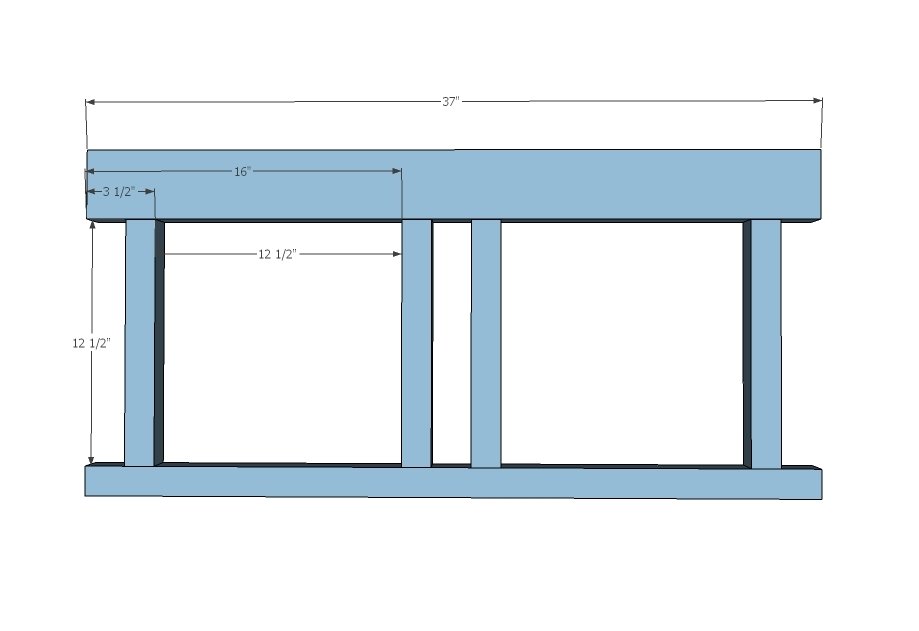
I'd lay all the boards out first just to make sure everything fits. And then start assembling. For a painted finish, pocket holes on the back sides will work great. TIP: Hide pocket holes on insides of the 2x2s - will get covered up in next step.
Step 5
Step 6
And then make up 8 of these little Y guys and attach in place. These are more decorative than anything, so a good outdoor glue could even be used to secure.
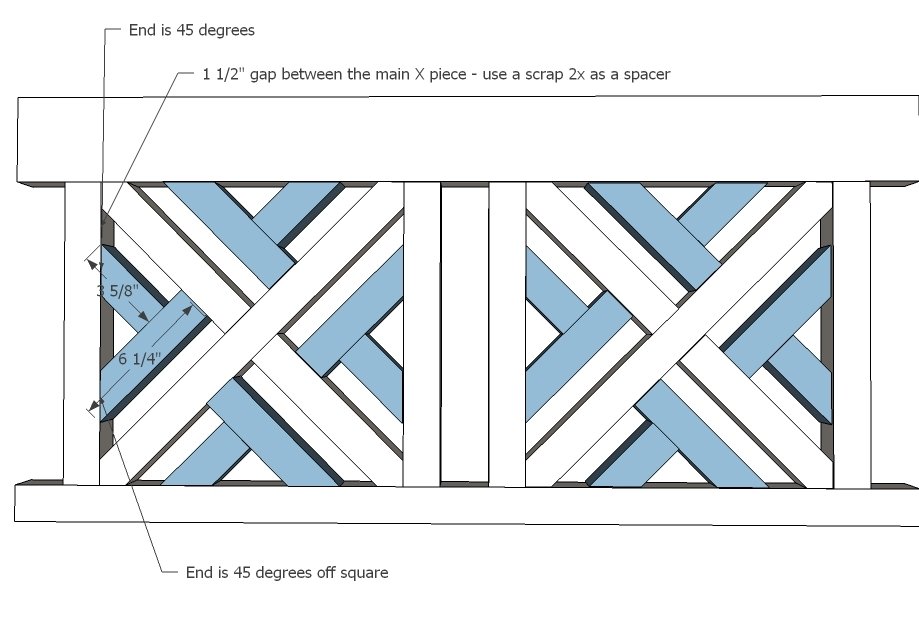
And then attach to back.
If you used pocket holes, I highly recommend filling any exposed holes with plugs.
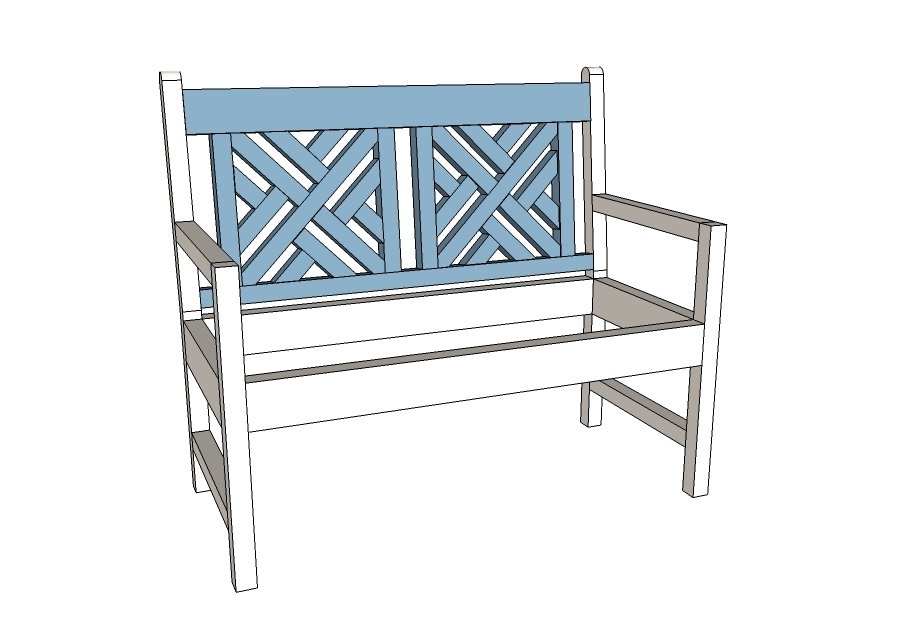
Step 8
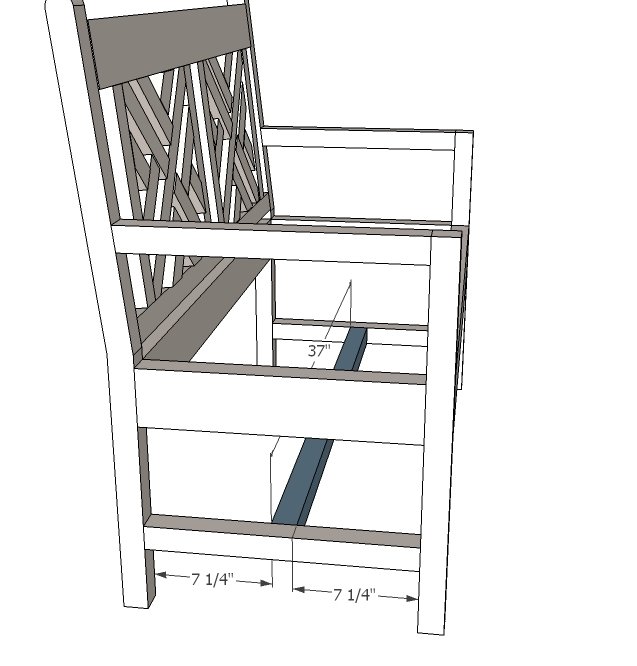
Attach bottom stretcher to base.
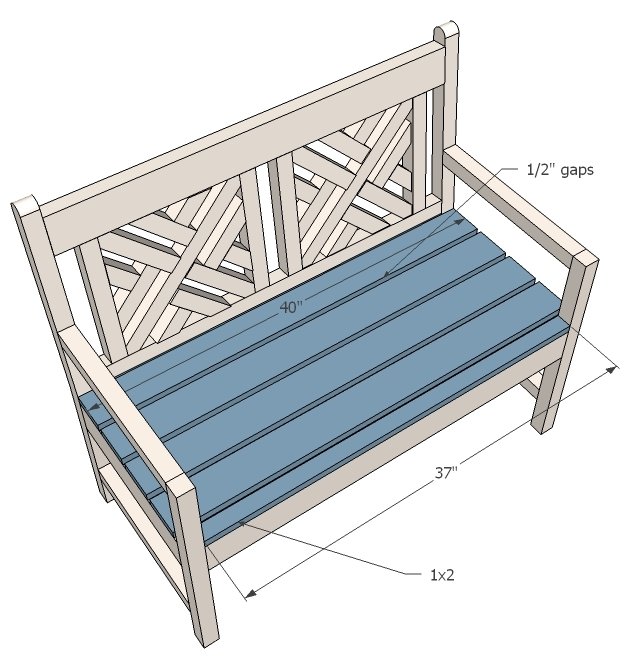
And finally, add the seat slats on top.
These can be attached from underside with 2" screws and glue to hide screw holes.
Step 10
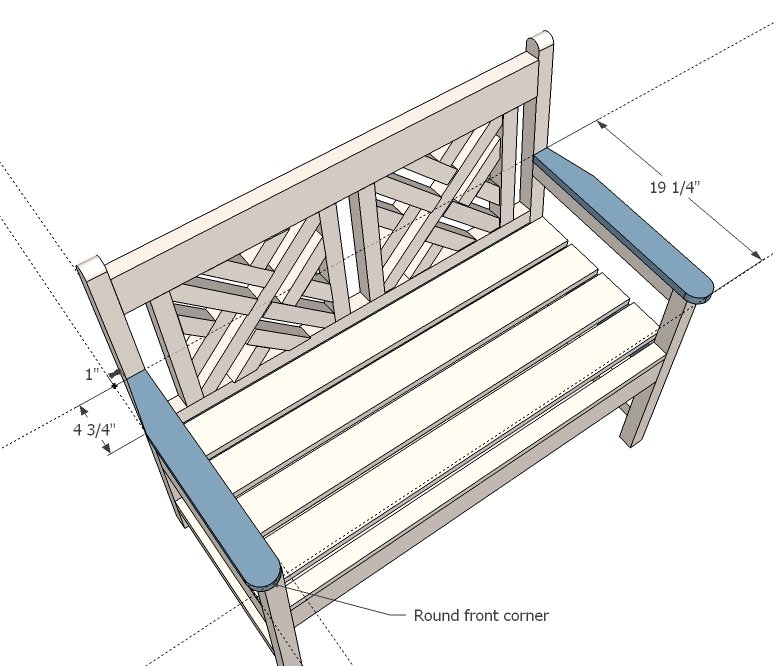
Don't forget the arm rests! You can attach these from the underside with 2" screws and glue to hide any holes.
Finishing
Sand all surfaces, starting with a medium grit and finishing with fine. Wipe off the dust, fill any holes or gaps with wood filler, and sand smooth once dry. Apply primer if you're painting, then finish with your choice of paint or stain and seal with a durable clear topcoat. For outdoor projects, use exterior-rated primer, paint or stain, and sealer so the piece stands up to the weather.
Source (temporary): https://www.ana-white.com/woodworking-projects/woven-back-bench