X Bench (Works with X Outdoor Table)
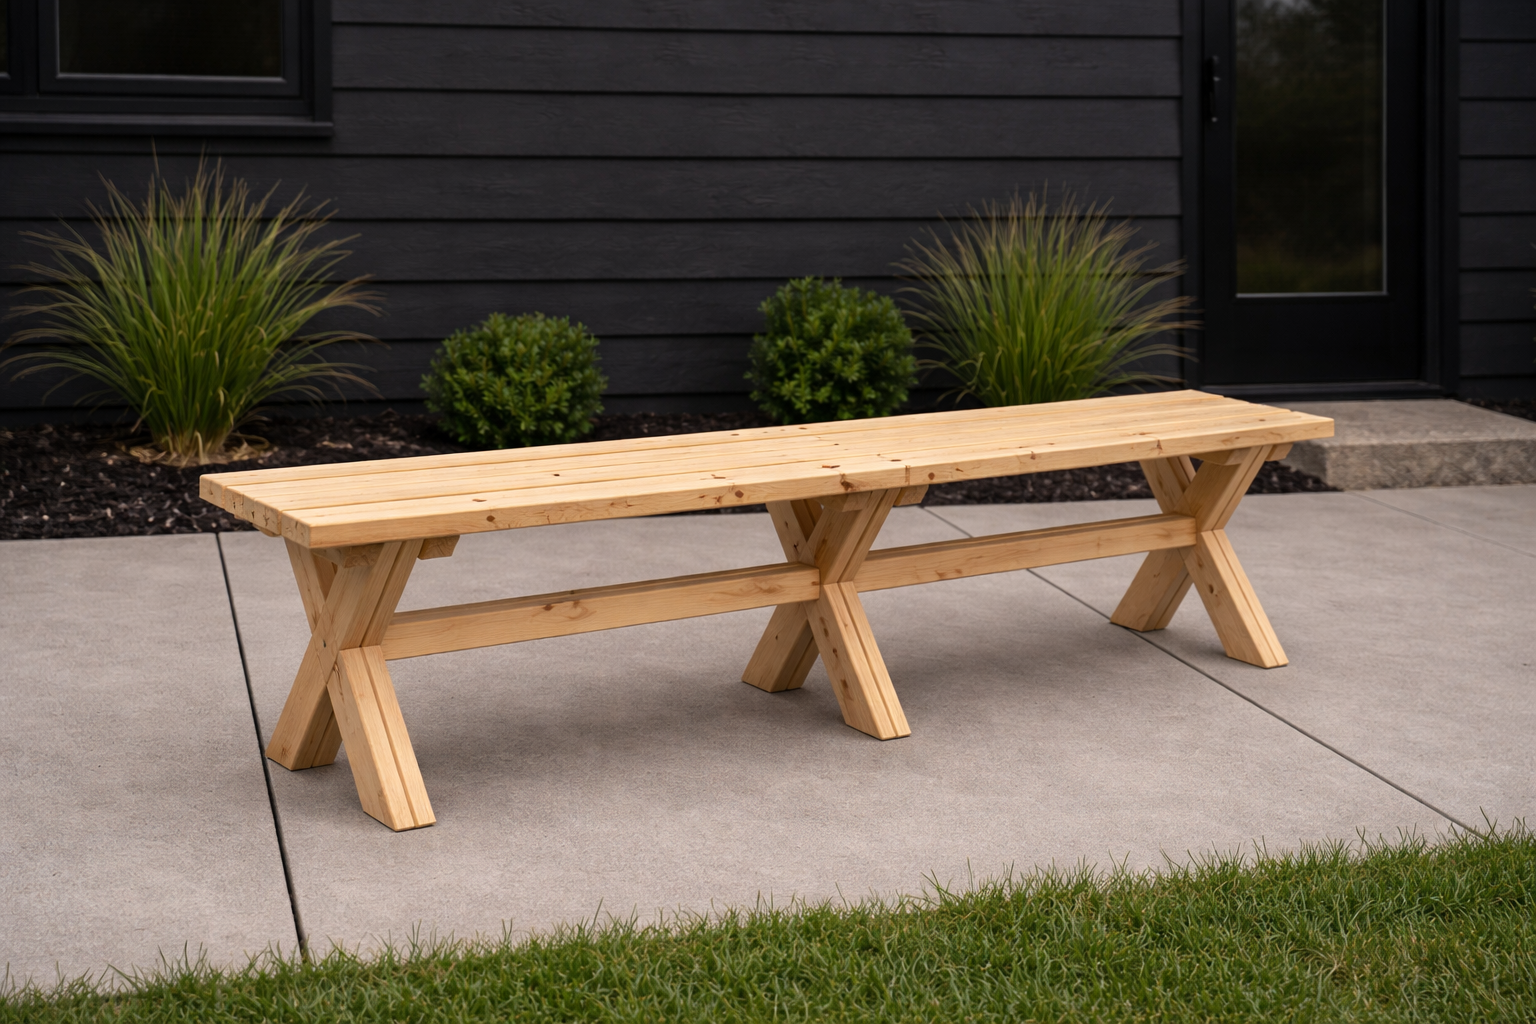
Build a beautiful, farmhouse-style bench with. This sturdy design features classic X-base legs and a center support for added strength, making it perfect for dining tables, entryways, or outdoor seating. Designed with beginner-friendly construction in mind, this bench uses standard dimensional lumber and simple tools—no complicated joinery required. The long, clean lines and timeless design make it a versatile piece that works in any space. Features: • Classic X-leg design with center support for extra strength • Comfortable 18" seat height • Simple construction using basic tools • Works great for indoor or outdoor use • Budget-friendly materials Whether you're building your first project or adding seating to an existing table, this bench is a quick, satisfying build with professional-looking results. 👉 include step-by-step diagrams, cut list, and shopping list.
Specifications
| Project type | Picnic Tables and Outdoor Dining |
|---|---|
| Room | Outdoor |
| Style | Farmhouse Furniture |
| Difficulty | Intermediate |
| Estimated cost | $20 - $50 |
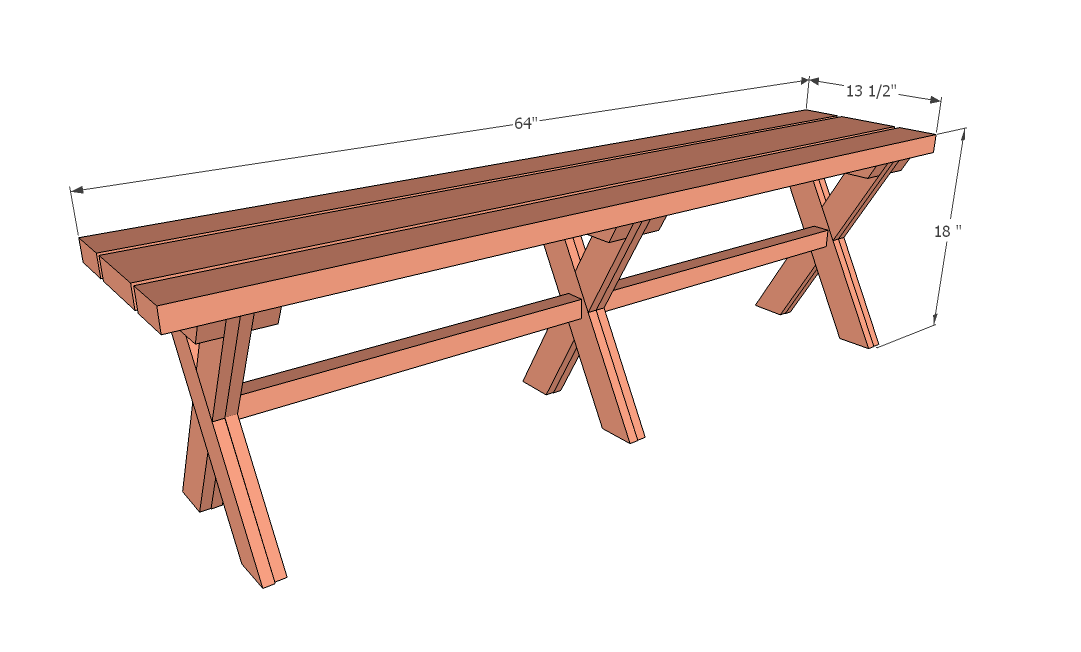
Dimensions
Use the size-specific shopping and cut lists below.
Shopping List
- 3 - 1x3 @ 8 feet long
- 2 - 2x2 @ 8 feet long
- 2 - 2x4 @ 8 feet long
- 1 - 2x6 @ 8 feet long
Cut List
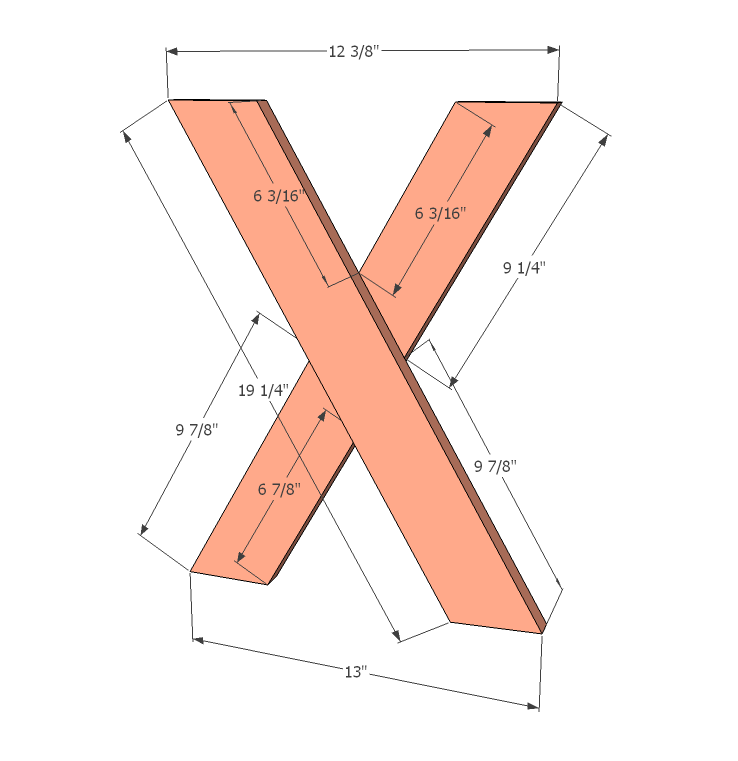
- 6 - 1x3 @ 19 1/4" with both ends cut at 30 degrees off square, ends parallel to each other
- 6 - 1x3 @ 9 1/4" long point to long point, both ends cut at 30 degrees off square, ends NOT parallel to each other
- 6 - 1x3 @ 9 7/8" long point to long point, both ends cut at 30 degrees off square, ends NOT parallel to each other
- 6 - 2x2 @ 12 3/8" long point to long point, both ends cut at 30 degrees off square, ends NOT parallel to each other
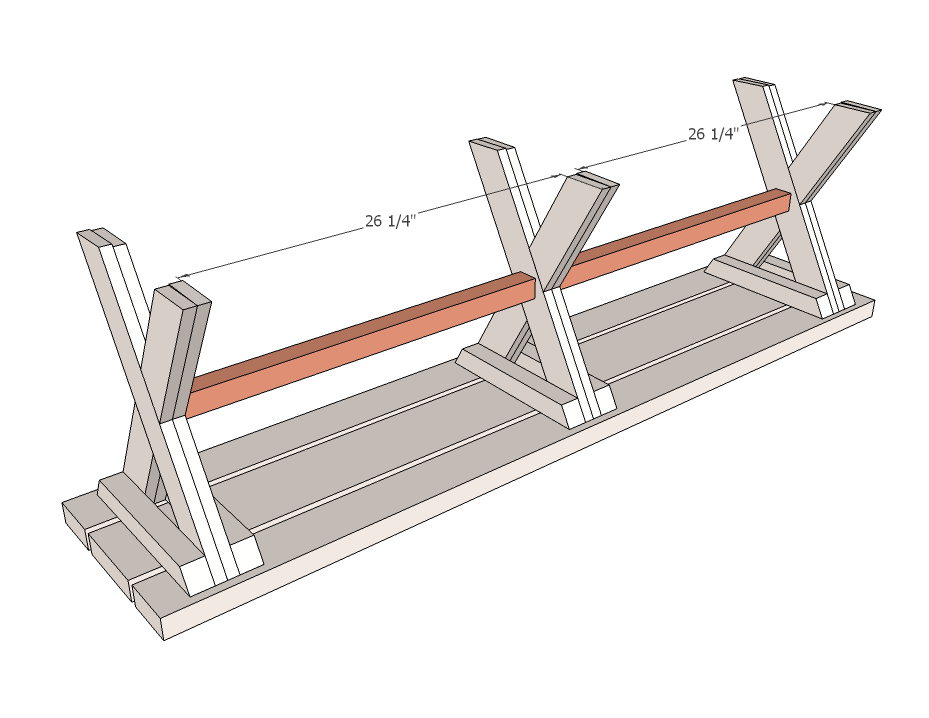
- 2 - 2x4 @ 64"
- 1 - 2x6 @ 64"
Tools
- measuring tape
- square
- pencil
- safety glasses
- hearing protection
- kreg-jig
- drill
- compound miter saw
- nailer
- sander
- level
- countersink drill bit
Step-by-step Instructions
Step 1
Use the smaller leg pieces to guide you here... attach the two longer leg pieces with 1 1/4" fasteners and wood glue.
Step 2
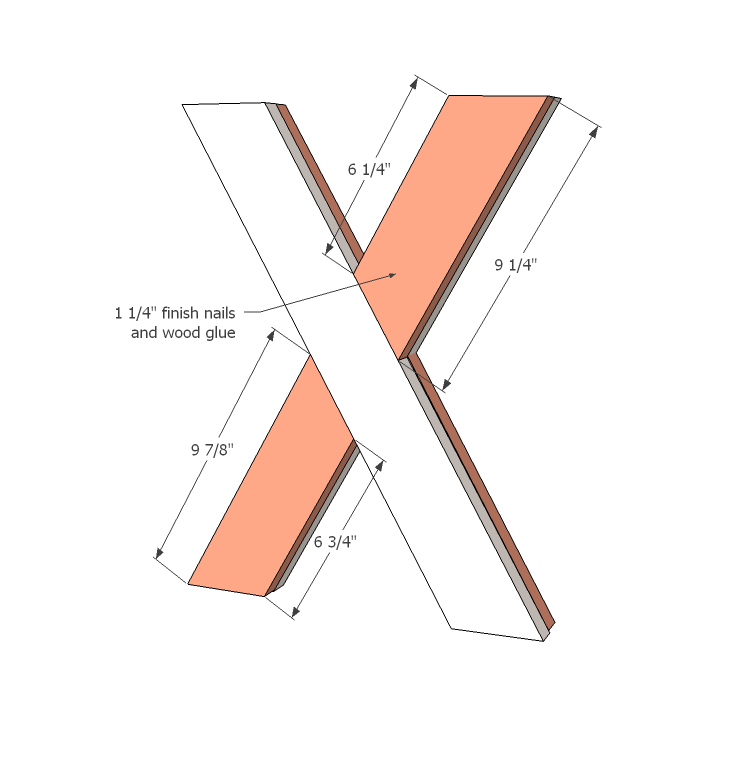
Fill in the spaces with the smaller leg pieces, using 1 1/4" fasteners and wood glue.
Step 3
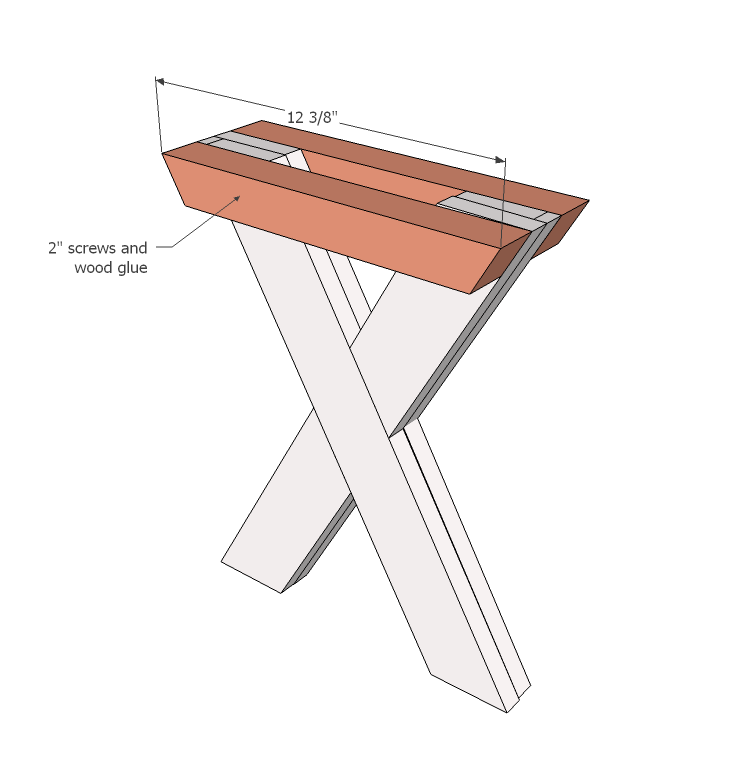
Attach top blocks with 2 1/2" screws and wood glue.
Step 4
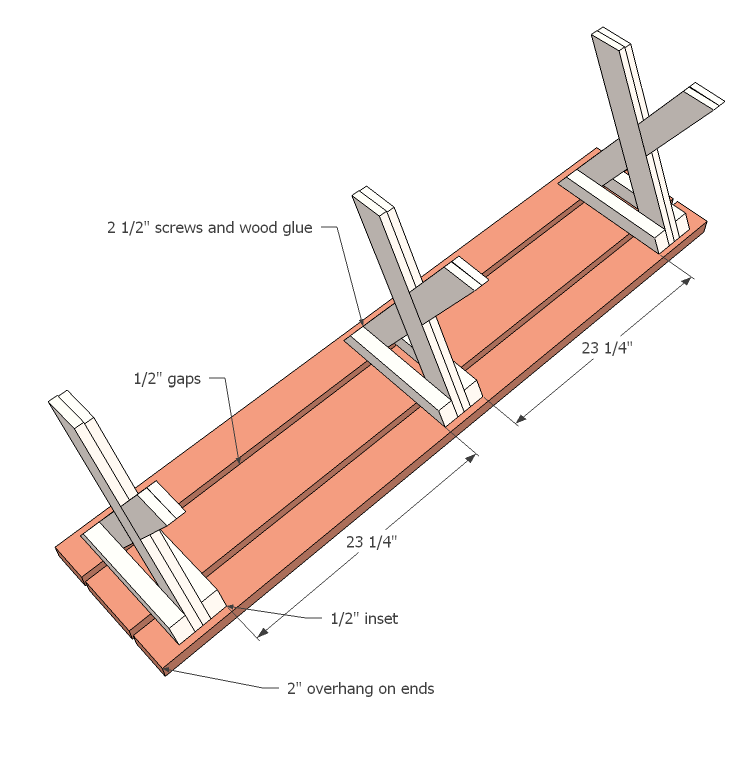
Attach the legs to the tabletop boards with 2 1/2" screws and wood glue.
Step 5
Finishing
Sand all surfaces, starting with a medium grit and finishing with fine. Wipe off the dust, fill any holes or gaps with wood filler, and sand smooth once dry. Apply primer if you're painting, then finish with your choice of paint or stain and seal with a durable clear topcoat. For outdoor projects, use exterior-rated primer, paint or stain, and sealer so the piece stands up to the weather.
Source (temporary): https://www.ana-white.com/woodworking-projects/x-bench-free-plans-works-x-outdoor-table