X Desk With Drawer
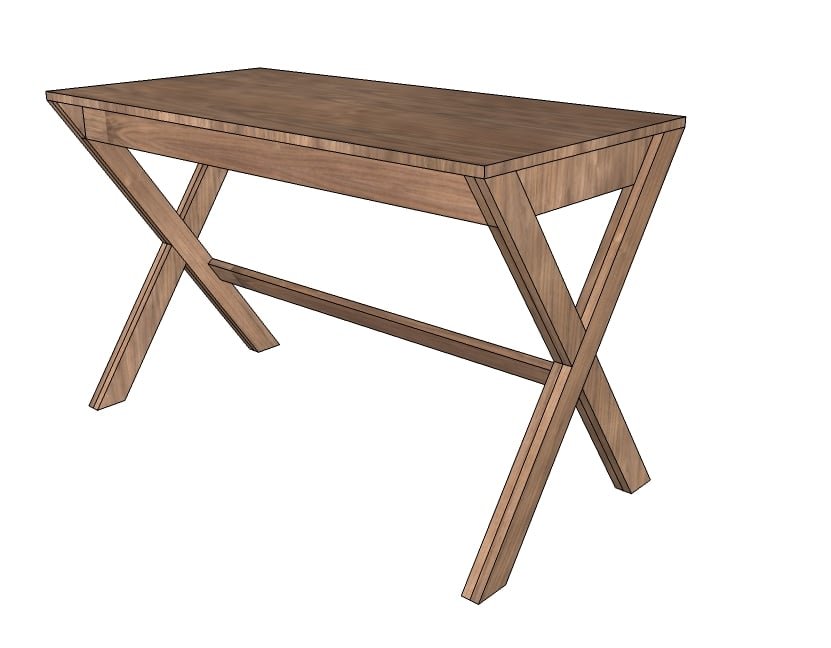
Build a X desk with these free easy do it yourself plans! Features step by step instructions, detailed diagrams, cut list and shopping list.
Specifications
| Project type | Desk, Desk Systems and Project Table Plans |
|---|---|
| Room | office |
| Style | Modern Style Furniture Plans |
| Difficulty | Intermediate |
| Estimated cost | $20 - $50 |
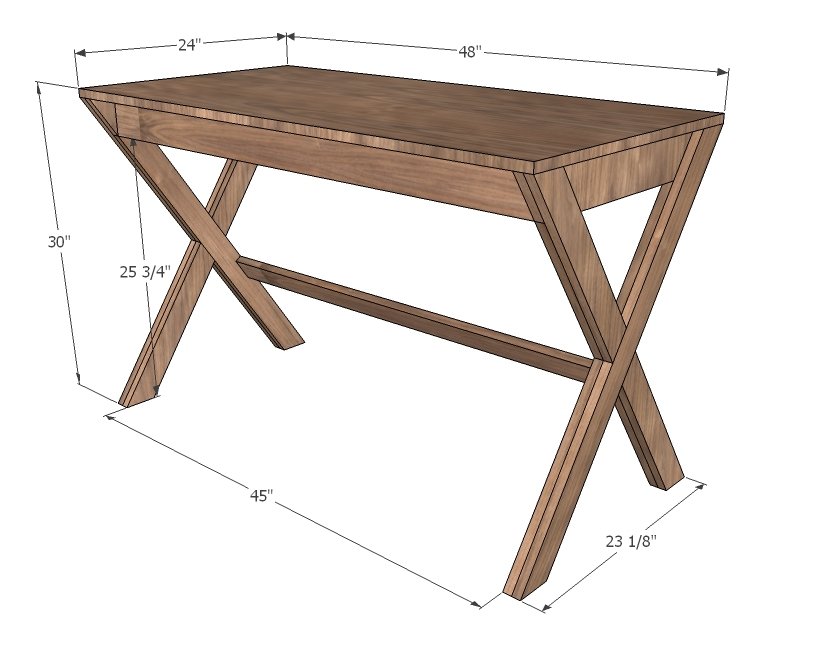
Dimensions
Use the size-specific shopping and cut lists below.
Shopping List
6 - 1x3 @ 8 feet long - Shop around for 1x3s with very sharp, square edges
1 - 1x4 @ 12 feet long
1 - 3/4" plywood or other project panel 24" x 48" suitable for desktop use
1 - 1/4 sheet 1/4" plywood or hardboard
2 - 16" Euro style drawer slides (the cheap white ones that attach to the bottom corners of the drawers)
Cut List
2 - 1x3 @ 35 3/4" - Both ends cut at 35 degrees off square, ends are parallel to each other
2 - 1x3 @ 31 3/8" - Both ends cut at 35 degrees off square, ends are parallel to each other
4 - 1x3 @ 17 1/2" - One end cut at 20 degrees off square, other end cut at 35 degrees off square, measurement is longest points - SEE IN STEP 1 AND 2
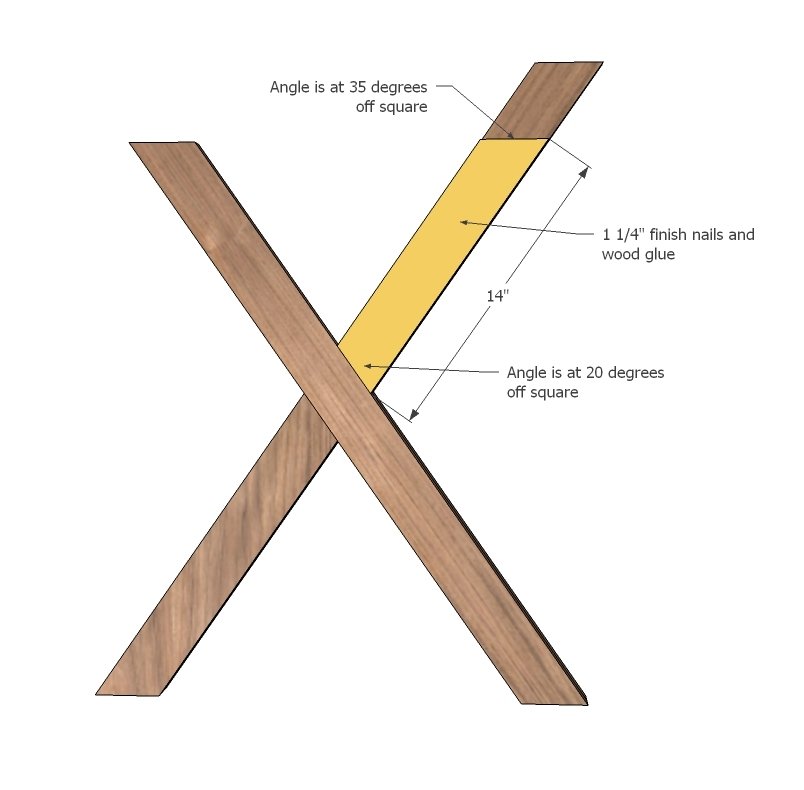
2 - 1x3 @ 14" - One end cut at 20 degrees off square, other end cut at 35 degrees off square, measurement is longest points - SEE IN STEP 4
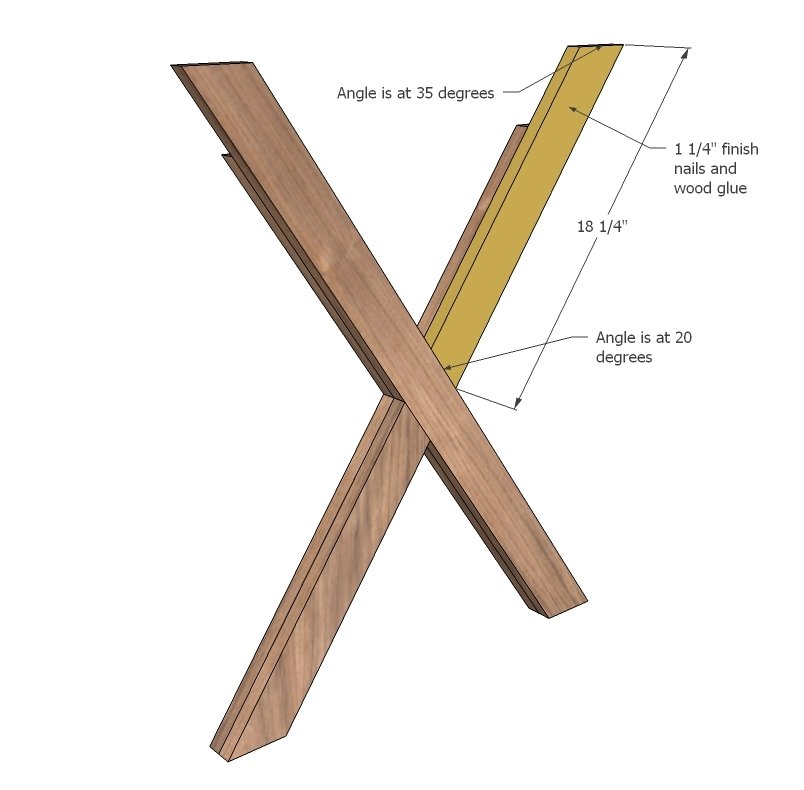
2 - 1x3 @ 18 1/4" - One end cut at 20 degrees off square, other end cut at 35 degrees off square, measurement is longest points - SEE IN STEP 5
2 - 1x4 @ 24" - Both ends cut at 35 degrees off square
2 - 1x4 @ 45"
1 - 1x3 @ 45"
1 - 1/4 sheet plywood or other project panel 48" x 24"
Drawer
4 - 1x3 @ 15 1/4"
2 - 1x3 @ 12"
1 - 1x3 @ 44"
1 - 1/4" plywood or hardboard @ 44" x 16"
Tools
- measuring tape
- square
- pencil
- safety glasses
- hearing protection
- drill
- compound miter saw
- nailer
- sander
- countersink drill bit
Step-by-step Instructions
It would be a good idea to lay out your legs first. A dry run will minimizes mistakes later.
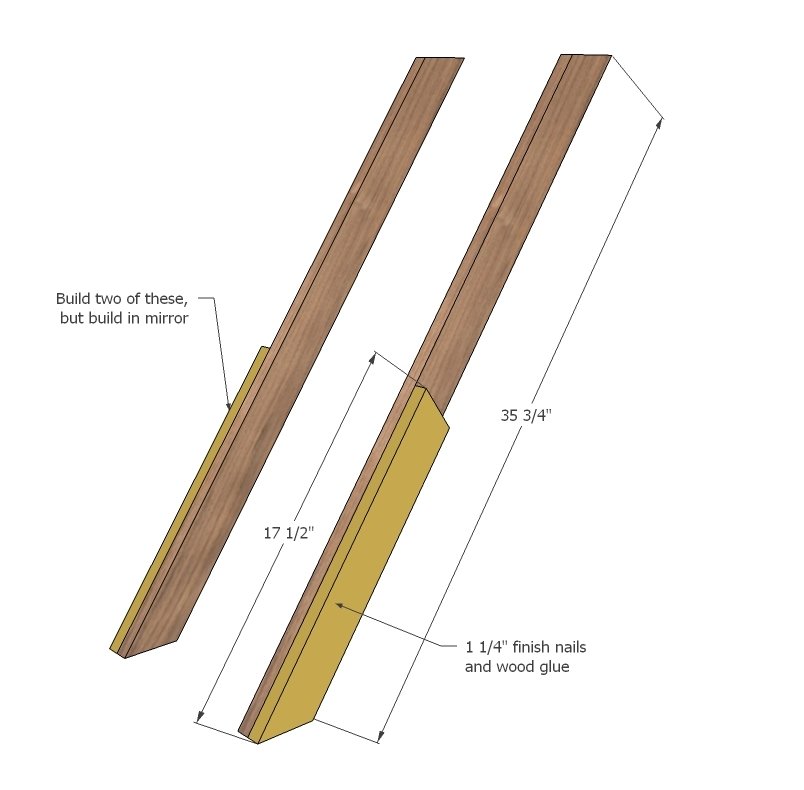
Start with the two longest leg pieces. Notice you will need to build two leg sets that are mirrored. Attach the 17 1/2" long leg pieces to the bottoms with 1 1/4" finish nails and wood glue. Take great care to line edges up - you want to create the illusion of a solid wood leg here. This will save you sanding work later!
Step 2
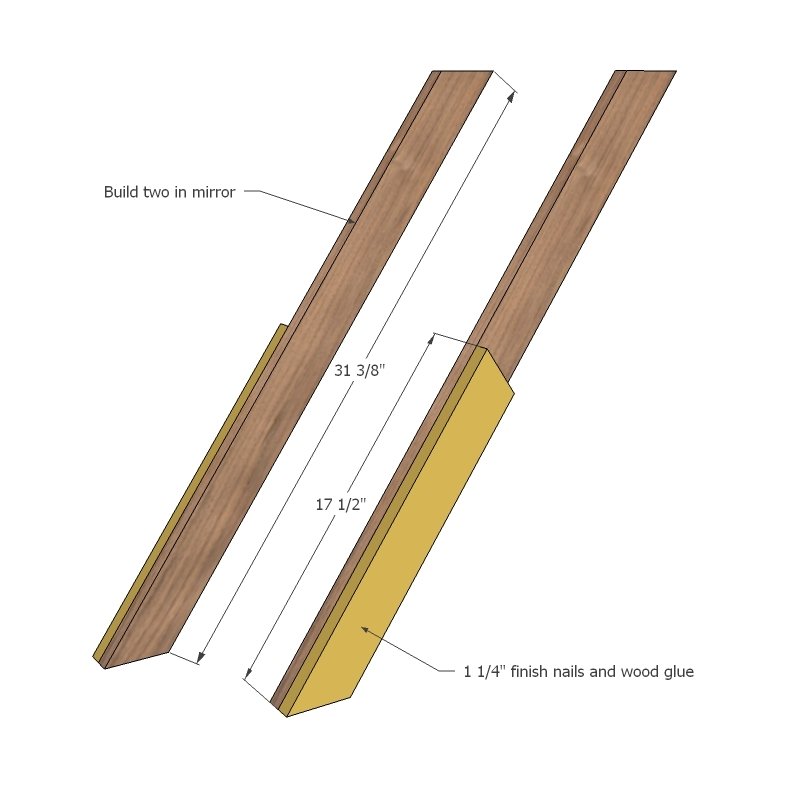
Do the same for the shorter full legs. Note that the middle angles are all 20 degrees off square, but top and bottom angles are 35 degrees off square.
Step 3
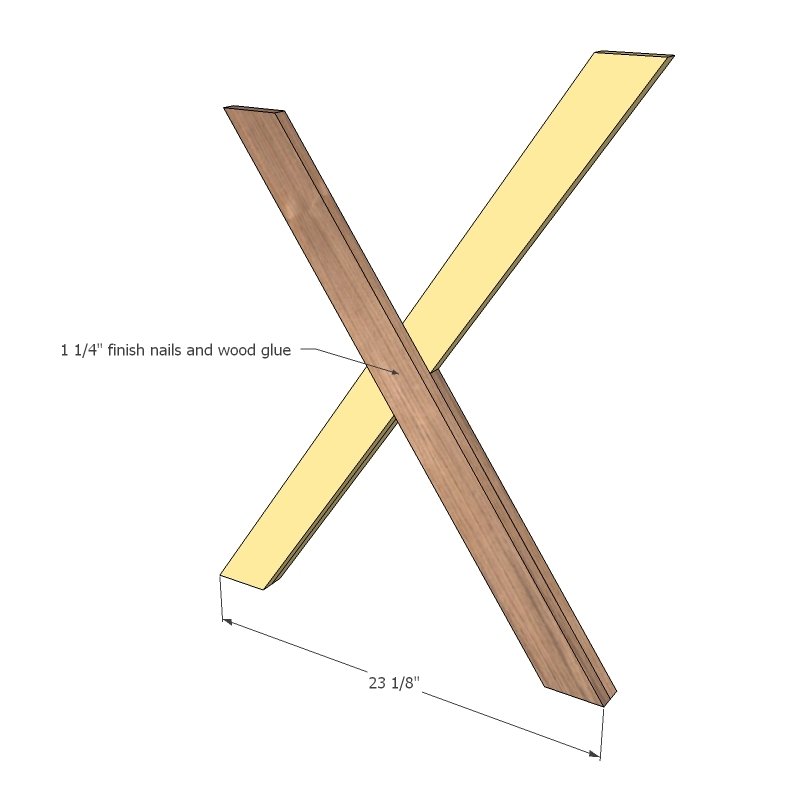
Position a leg set including one short and one long leg, crossing in the middle. Check to make sure the bottom overall spread is 23 1/8" exactly. Glue and nail down when satisfied. Build remaining leg in mirror.
Step 4
Fit the long top leg with the remaining short filler piece. Nail down.
Step 5
Step 6
Position the side aprons in this notch and glue and nail down.
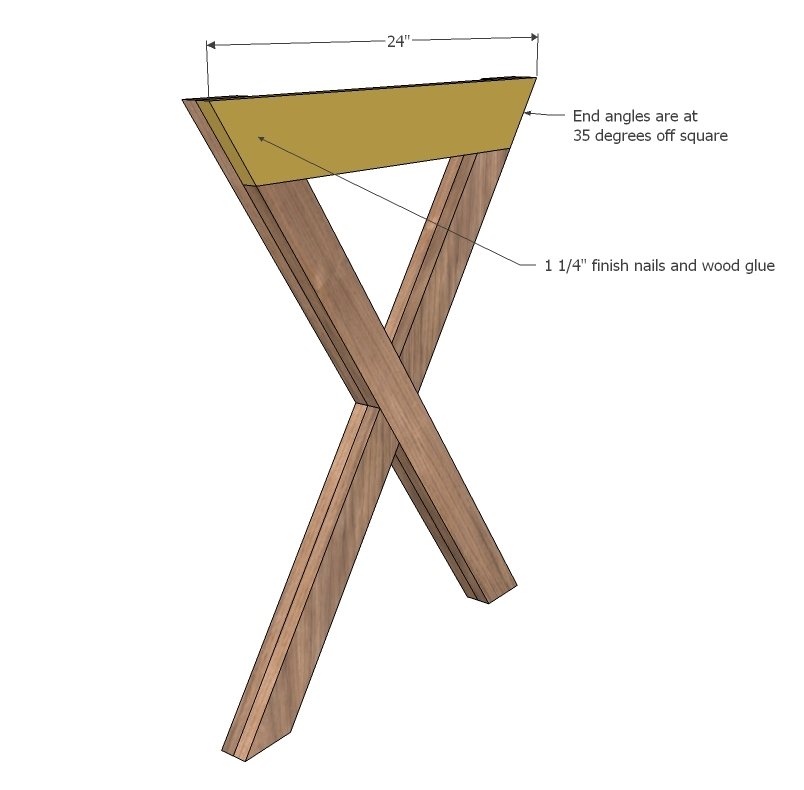
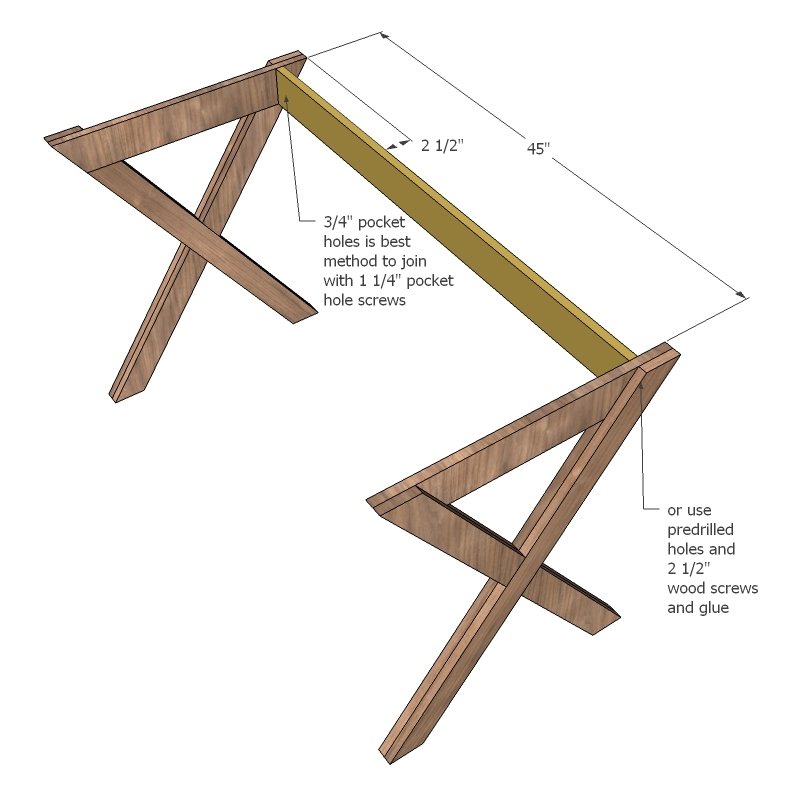
Notice the side aprons both sit to the inside. Attach back apron as directed in diagram.
For a drawerless desk, simply add the front apron too.
Step 8
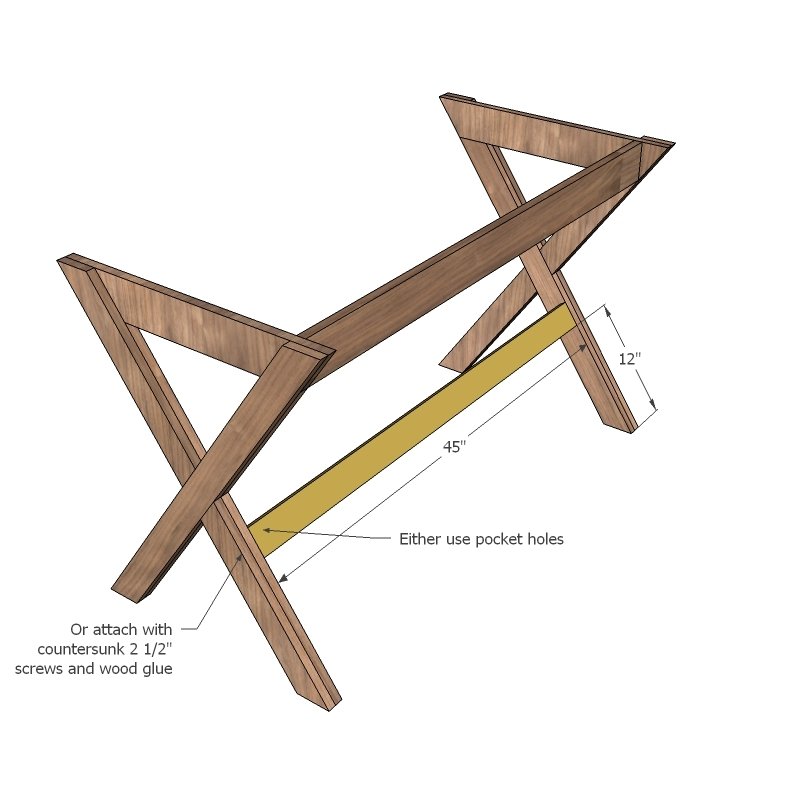
Bottom stretcher is a 1x3. Attach same as back apron.
Step 9
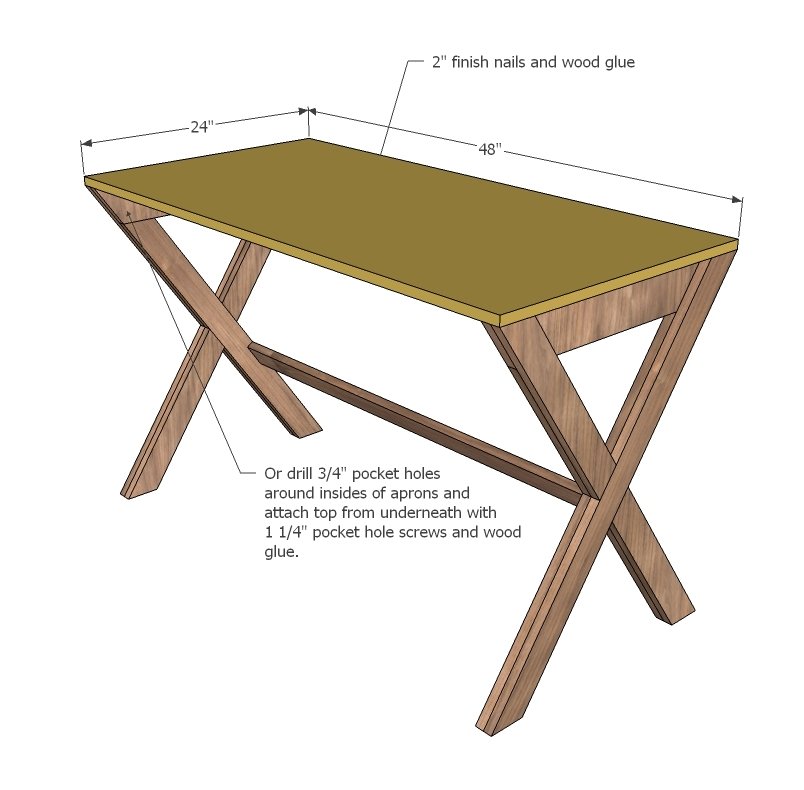
Followed by the tabletop. If you have a pocket hole jig, you will want to attach through aprons with 3/4" pocket holes and 1 1/4" pocket hole screws (drill pocket holes PRIOR to step 7). Otherwise, nails and glue down with 2" finish nails.
Step 10
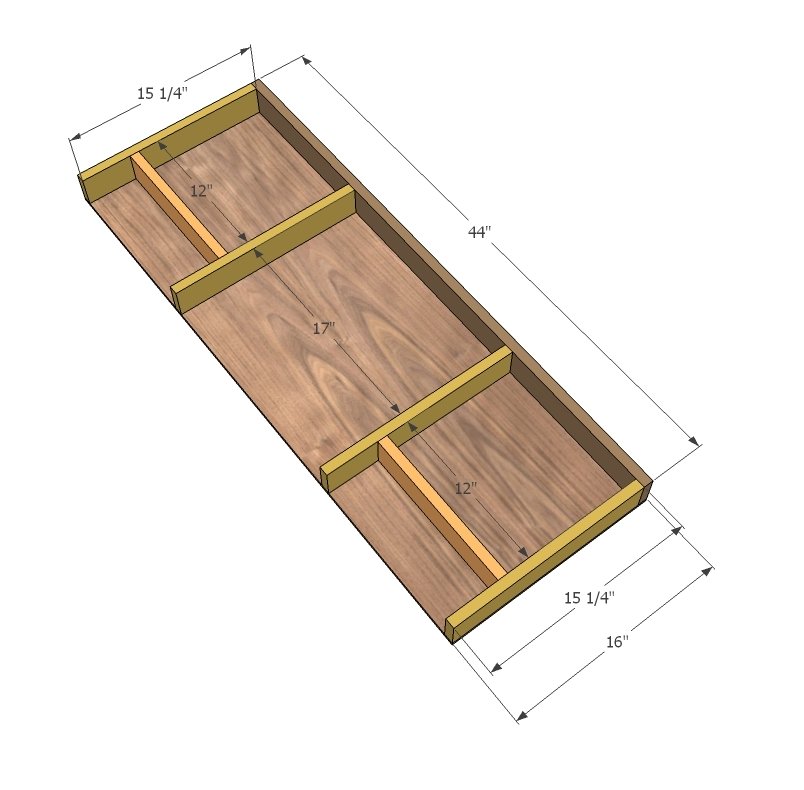
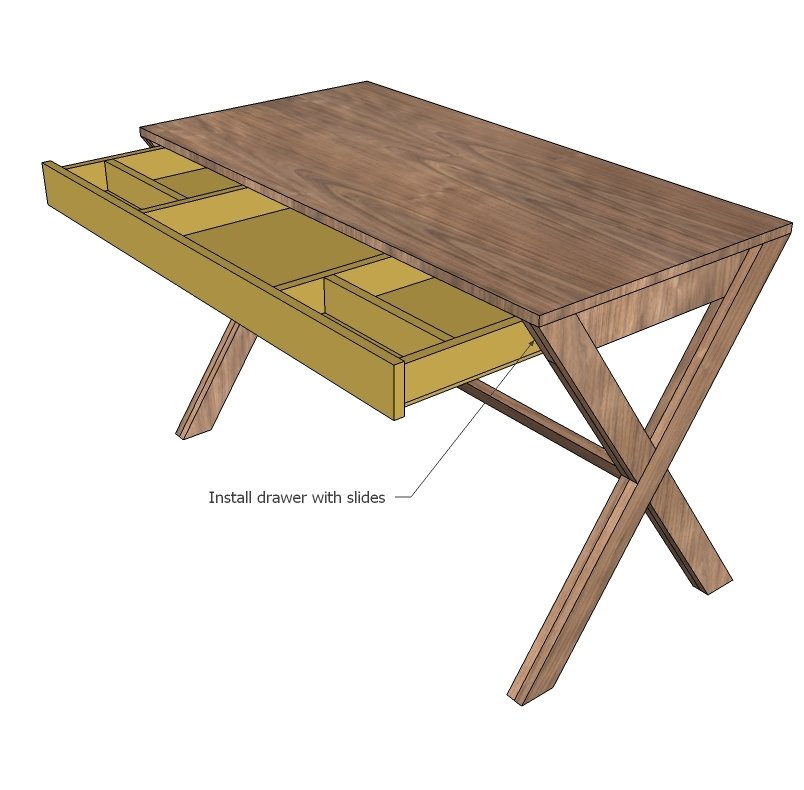
For the drawer, build as shown above. Attach plywood to the bottom with 1 1/4" finish nails and wood glue. Check to make sure your drawer is square and overall 1" less in width than the opening in the desk.
Step 11
Attach drawer members to drawer bottom side corners. Attach cabinet members to insides of desk. Follow the instructions in this plan for installing drawers.
Step 12
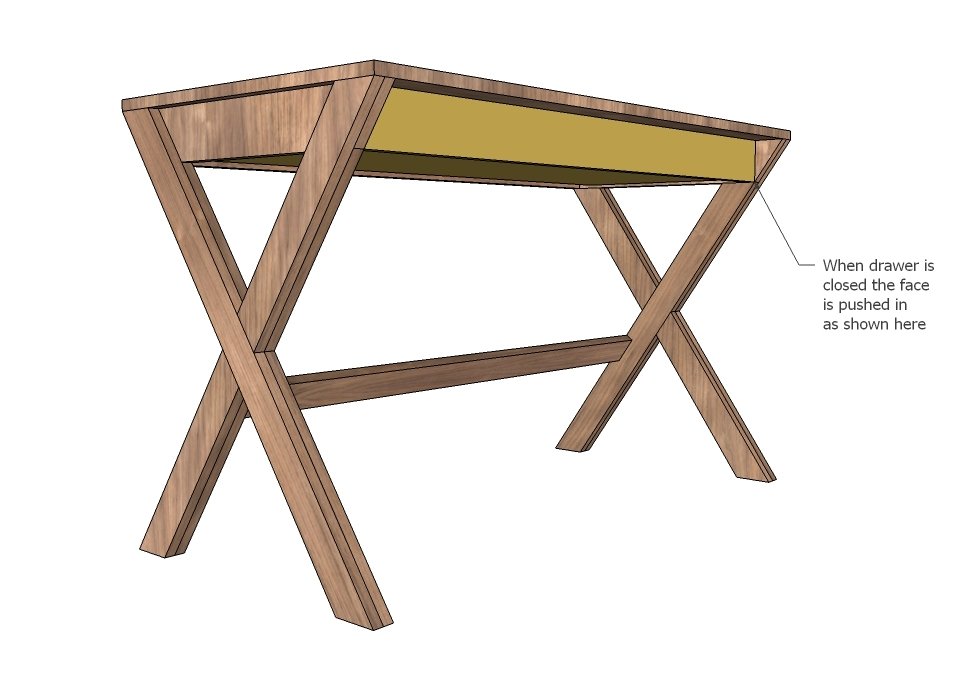
When the drawer is closed, it sits inset on the desk as shown above.
Finishing
Sand all surfaces, starting with a medium grit and finishing with fine. Wipe off the dust, fill any holes or gaps with wood filler, and sand smooth once dry. Apply primer if you're painting, then finish with your choice of paint or stain and seal with a durable clear topcoat. For outdoor projects, use exterior-rated primer, paint or stain, and sealer so the piece stands up to the weather.
Source (temporary): https://www.ana-white.com/woodworking-projects/x-desk-drawer